... but right now my computer refuses to recognize my camera, so I can't post photos even though I've taken then!
I made these last weekend - they've turned out perfectly ever since I made the first batch a year ago. I find that the recipes from Canadian Living are pretty much no fail, no matter what I bake.
Dark and Dangerous Triple Chocolate Cookies
As with all other drop cookies that I make, I use a measured scoop (1.5 tbsp size) and dip it into hot water between scoops. You really do get better consistency and know what your dough yield will be with each batch.
Yesterday I made Chocolate Crunch cookies - 5 dozen! - and today I'm making another batch of Chocolate Peanut Butter Mallow Bars. Time to go mix some batter...
Sunday, December 19, 2010
Sunday, December 5, 2010
Butter, butter, everywhere...
Okay, I've restocked all my dry ingredients - fruits, nuts, every kind of holiday sprinkle - and now the butter's been bought too, all four pounds of it! Non-bakers will laugh, but along with flour and sugar, it's what gets used up first when you're baking cookies at the holidays.
Speaking of which, that's what I'll be doing next weekend. I've already decided I'll be making Rugelach, Dark and Delicious Triple Chocolate Cookies, Chocloate Walnut Crunch and probably another tray of Chocolate Peanut Butter Mallow Bars, especially because Duncan hasn't tried them yet. And yeah, chocolate is probably the favourite flavour in this house.
As for today, I'm off to see "Priscilla, Queen of the Desert" this afternoon!
Tuesday, November 30, 2010
Sorrow! Ace of Cakes is ending :(
About a week ago, my daughter mentioned reading an article talking about one of my favourite shows, Ace of Cakes, ending after it's 10th season, which is actually 5 years of episodes. I took it as a rumour, hoping it wasn't true. Unfortunately, I was wrong and here's Duff's blog from the Charm City Cakes website:
Charm City Cakes Blog
I have Duff and his brother Willie's book, but it just won't be the same thing without the new episodes every Thursday night...
Who else by the Charm City crew could have created my most favourite cake of all time, Hogwarts?

Sob...
Charm City Cakes Blog
I have Duff and his brother Willie's book, but it just won't be the same thing without the new episodes every Thursday night...
Who else by the Charm City crew could have created my most favourite cake of all time, Hogwarts?

Sob...
Sunday, November 21, 2010
Chocolate Peanut Butter Mallow Bars
After a trip yesterday to the bulk store to stock up on supplies, I finally got the chance to bake this afternoon. I've had a yen to make these very easy squares for a few weeks and it was worth the wait.
The recipe was originally from Kraft Canada but, as usual, I changed it! :) The base is made with chocolate cake mix and it works out beautifully.
Ingredients:
1 pkg. 2 layer chocolate cake mix (I'm partial to the Devil's Food flavour)
1/2 cup (one stick) melted butter
2/3 cup milk (to be divided in half)
3/4 cup smooth peanut butter
1 cup mini marshmallows
1/2 cup salted peanuts
1/2 cup semi-sweet chocolate chips
Preheat oven to 350 degrees. I used a 7" by 11" non-stick baking pan, sprayed with non-stick cooking spray because the melted marshmallows are impossible to get off without some help.
In large bowl, combine cake mix, melted butter and 1/3 cup milk until blended. The mixture will resemble brownie batter, if slightly drier. Spread 2/3 of the cake mixture evenly in pan and bake for 12-14 minutes, or until centre appears set. You can test this by seeing if the cake "jiggles" - if it does, it needs a few more minutes. Remove from oven when done and allow to cool for 3-4 minutes, while your oven remains on.
In a heat proof bowl, combine peanut butter and the second 1/3 cup of milk. Microwave for 30-40 seconds before attempting to blend together. If you don't warm the mixture, it will feel like mixing cement. Once blended, this mixture will look like a caramel spread. Spread evenly over the slightly cooled cake base. Top with remaining cake mix (dropped randomly across the top), the marshmallows, peanuts and chocolate chips. I like to lightly press the peanuts into the mixture so they don't overbrown.
Bake for an additional 18 minutes or just until the centre is set. Cool thoroughly before cutting into bars. Using this size of baking dish, it yields 18 bars. They're perfect with a glass of milk. :)

Sunday, November 7, 2010
Ina has a new cookbook out!
I haven't posted much in the last two weeks because I haven't been baking much. Most of my supplies are depleted and I desperately need to get to the bulk barn to restock the baking cupboard. It's no fun trying to figure out what to make without any fruits or nuts in the house!
But I digress. I was thrilled to get Ina Garten, the Barefoot Contessa's new cookbook, "How Easy Is That?" the day after it was released:

The first thing I'll be making is Red Velvet Cupcakes - can't wait!
But I digress. I was thrilled to get Ina Garten, the Barefoot Contessa's new cookbook, "How Easy Is That?" the day after it was released:
The first thing I'll be making is Red Velvet Cupcakes - can't wait!
Thursday, October 21, 2010
Apple Blackberry Crisp with Almonds
Life at the Baker's house has been busy lately, but I did use up my Spartan apples on Sunday to make Apple Blackberry crisp with almonds. The last time I made crisp my friend Laurie said that I didn't post my recipe, so here it is. It was adapted from one in "The Family Circle Cookbook - New Tastes for New Times", which you can see behind the messy plate of crisp and French Vanilla ice cream. The apples were dyed a lovely dark red by the blackberries. :)

Crisp Topping:
1/2 cup flour
1/2 cup oats (not quick cooking type)
1/2 cup brown sugar
1/2 tsp cinnamon
1 stick softened unsalted butter, with one tbsp reserved for filling
2/3 cup sliced almonds
Crisp Filling:
5-6 medium Spartan (approx. 1.5 lbs.)
1/2 pint (small pkg.) blackberries
1/3 brown sugar
1 tbsp unsalted butter (see above)
1 tsp grated lemon rind
1 tbsp lemon juice
2 tsp flour
1/2 tsp cinnamon
Preheat oven to 375 degrees. Coat a pie dish or rectanglar dish with non-stick spray or use butter if you prefer. Blend crisp filling together with a pastry blender and add almonds once it has been thoroughly mixed. After peeling and slicing apples, mix with lemon rind and juice. Toss filling with flour, brown sugar, cinnamon and layer apples with washed blackberries in the baking dish. Distribute pieces of the reserved butter over the fruit filling. Cover evenly with the crisp topping. At this point, the crisp can be stored in the refrigerator to bake later, or go straight into the oven. Bake for 30 to 40 minutes, watching closely after 30 minutes so that the nuts don't brown too much.
Serve warm with French Vanilla ice cream and enjoy!
Monday, October 11, 2010
Thanksgiving means apple pie!
Since I don't like pumpkin pies, or pumpkin desserts, Thanksgiving at my house is when I make apple pie. The apples are just gorgeous right now and I found the most perfect Spartans last week for this yummy treat.
With all my baking adventures, I still haven't mastered making pie dough and my buddy Darleen and I still haven't had the lesson she promised me on how to make that "perfect dough." Last year I discovered a wonderful invention - Pillsbury Pie Dough! Not pie shells, but two rounds of dough, rolled into two sleeves and neatly packed in one box, ready to use. I was so happy to find Pillsbury's product and it did not disappoint - the room temperature dough was easy to use and it was lovely and flaky after baking.
I wanted a good filling recipe and turned to my usual go-to - Ina! I modified the recipe (when don't I?) to use Spartan apples instead of Granny Smiths. I learned by trial and error years ago that you should *never* bake with Macintoshs unless you want an applesauce filling. They have far too much juice to bake well in a pie or a crisp. I also only had oranges at home so I used them instead of the lemon-orange zest and the same juice combination. Since I find nutmeg and allspice quite heavy I skipped them and increased the cinnamon to a full teaspoon. My other addition, which Anna Olsen suggests with her pie recipes, is one tablespoon of cold butter dotted across the apple filling, before you add the top pie layer. The butter helps the juice turn into more of a sauce, rather than having a runny mess when you cut into the pie.
Ina's Deep Dish Apple Pie
My pie isn't absolutely perfect, but it tasted wonderful - there's only one slice left today!

My lovely mother, The Baker, also brought some from-scratch goodies - palmiers (already gone!) and her world famous Lemon Squares, which aren't exactly square. :)

I know I still have enough Spartan apples left to make some more crisp next weekend...
Sunday, October 3, 2010
Chocolate Crunch Cookies
I feel like I need to get back into practice baking cookies after a long summer off, since I have my United Way Hallowe'en bake sale coming up on October 29th. I haven't made this recipe in a while, but it always turns out well now, after I made some tweaks to the recipe. Notice a recurring theme in the recipes here? ;)
In Ontario, the Liquour Control Board of Ontario - or the good old LCBO - produces an absolutely beautiful magazine called "Food and Wine" and they also feature recipes without booze in them. This one was included in a story called "Cafe Culture", but I don't remember the name of the cafe in Ottawa where it originated. The recipe uses a lot of butter and, as I discovered the first time I made them, they spread like crazy in the oven. Since the instructions called for a 3 tbsp. scoop of dough - that's the size of a metal ice cream scoop - they all ran together and browned too much. When I tried to lift them off the cookie sheet, they were so delicate that I ended up with cookie "granola". My version of the recipes uses less sugar, with no difference in taste, and they're much smaller cookies. They're also easier to handle when cooling and you get twice as many from the batch! The "crunch" comes from the Rice Krispies, the oats and the nuts.

Chocolate Crunch Cookies
1-1/2 cups/3 sticks butter, softened
3/4 cup brown sugar
3/4 white sugar
2 eggs
1 tsp vanilla
2 cups flour
1 tsp baking powder
1 tsp baking soda
1 tsp salt
2 cups oats (regular, not quick cooking)
2 cups Rice Krispies cereal
1-1/2 cups chocolate chips
1/ cup chopped walnuts or pecans
Preheat oven to 350 degrees. Prepare baking sheets with no-stick spray or parchment paper, which is my preference. Normally I would use my stand mixer to blend this recipe, but there's so much batter I use the largest mixing bowl I own and a hand mixer. In bowl, blend butter and sugars until fully incorporated. Blend in eggs and vanilla, set aside. In separate bowl, sift or whisk together flour, baking soda, baking powder and salt. Add dry mixture to wet slowly with mixer. Next, blend in oats, Rice Krispies, chocolate chips and nuts with a spatula, until well mixed. Make sure you mix right to the bottom of the bowl, to ensure all the flour mixture is blended in fully.
This is a very "wet" batter, so fill a glass or cup with hot water to dip your scoop or spoon into for each cookie. I use a 1 tbsp sized ice cream scoop, which looks like the size of a melon baller. At this size, 8 cookies per sheet bake very well, without spreading into each other. After scooping out cookies, flatten lightly with a moistened fork. Bake for 3-1/2 minutes, remove and reverse pans and bake for an additional 3-1/2 minutes. These times are based on my oven settings.
The cookies will appear underdone when removing from the oven, but that's how they should look. Let cookies cool for a mininum of two minutes, or they will crumble when lifting them out. When using this size of scoop, the yield will be 5 dozen or 60 cookies!
I was told last night not to expect them to last for the office gang...
Friday, October 1, 2010
Cranberry Walnut Banana Bread
I make a lot of banana bread because we never seem to get tired of it, but decided to to "turn up the volume" (tm The Barefoot Contessa) by adding cranberries to this recipe. I found the recipe as a tear-out card in a copy of Everyday Food magazine a few years ago courtesy of Glad Wrap of all things.
This fall, even though the recipe doesn't contain pumpkin, I had to use this adorable loaf pan that was a great find last winter at Williams-Sonoma. The pumpkins filling the little fence are just adorable. I was in the store in early December and noticed that the pan, which I coveted in the fall but wouldn't pay $40 for was reduced to $10, an absolutely fantastic price for Nordic Ware. They make the best decorative cake pans - they're heavy, so the heat is consistent throughout and the detail is amazing. I think it's pretty cute!

Cranberry Walnut Banana Bread
2 cups flour
1 tsp. baking soda
1/2 tsp. baking powder
1/2 tsp. salt
1/2 cup vegetable oil
1 cup granulated sugar
2 large eggs, beaten
4 medium/3 large sized ripe bananas, mashed
1/2 tsp. vanilla extract
3 tbsp. milk
1/2 cup chopped walnuts
1/2 cup dried cranberries
Preheat oven to 350 degrees, with rack set in the middle of the oven. Spray loaf pan with non-stick spray. Sift or whisk together flour, baking soda, baking powder and salt and set aside. Combine oil and sugar in large mixing bowl. Either a hand or stand mixer can be used. Blend to combine. Add eggs, bananas, vanilla and milk and continue to mix. Add flour mixture and blend until just combined. Stir in nuts and cranberries. Pour into pan, smooth top with spatula and transfer to oven. Bake until a toothpick inserted comes out dry, about 1 hour and 15 minutes. Times will vary depending on oven heat. You may also want to cover the loaf with foil after 45 minutes to prevent overbrowning of top. Yields approx. 14 3/4-inch sized slices. We eat it without anything on top but it's great with some butter too. At my house the coffee is mandatory!
Sunday, September 26, 2010
Sour Cream Blueberry Cake
The last few weeks have been crazy, but I finally managed to bake a family favourite last week. I love baking with fresh blueberries, although frozen are good in the winter, but I wanted to take advantage of the end of the season fruit while it was still available.

This recipe is from the Williams-Sonoma Desserts "Best of the Kitchen Library" book that my daughter gave me as a birthday gift last year. It's not in the current version of this cookbook, so I'll reprint it here:
Cake Ingredients:
3 cups flour
1 tbsp. baking powder
1/2 tsp. salt
6 tbsp. softened, unsalted butter
1-1/3 cups granulated sugar
2 large eggs
2 tsp. vanilla extract
1 tsp. finely grated lemon or orange zest (I prefer orange)
1/4 sour cream
3/4 cup mil
2 cups blueberries, fresh or frozen
Confectioner's Sugar Icing
1/4 cup (2 tbsp.) unsalted butter
1 tbsp. water or juice (lemon or orange)
1/2 Confectioner's/icing sugar (regular sugar does not work)
Preheat oven to 350 degrees. Grease or no-stick spray a regular Bundt pan. This is a very heavy batter, so it needs the interior "space" that a Bundt shape provides to cook properly.
In a large bowl, mix flour, baking powder and salt, either by sifting or whisking - whisking is faster and neater! In large mixer bowl, beat the butter until light. Add sugar and beat until blended. Add the eggs, one at a time, beating well after each addition. Add the citrus zest and vanilla, followed by the sour cream. Reduce mixer speed to low and add the flour alternately with the milk, beginning and ending with the flour until just combined. The batter will be very thick.
Spoon half the batter into the prepared pan. You will need to even it out with your spatula. Sprinkle one cup of the blueberries over the batter and gently press them into the batter. Repeat with the remaining batter, followed by the second cup of blueberries.
Bake 50-60 minutes, until cake tester is clean. Time will vary based on your oven. Let cool completely on wire rack before removing from pan.
Citrus Icing Sugar Glaze
In a microwave safe dish, melt butter with citrus juice until fully combined. I've found this works better than adding the juice after the butter melts, since it incorporates more smoothly. Whisk in icing sugar and you're done!
On cooled cake, drizzle icing evenly over the top, allowing it to run over the edges. Cake should serve 10 or more depending on the size of your slices.
Friday, September 10, 2010
How do you thank the movers?
Tomorrow is hopefully the last of moving day my dear daughter's stuff back into the house, after a few weekends of driving back and forth across the city. My best friend Fern, Megan and Duncan will all be here for lunch after the move and I wanted to make them something to go with our coffee after lunch. Since we've had some cool weather, my inspiration was to make a crisp. Unfortunately, I haven't seen any Spartan apples for sale yet - they hold their shape really well for baking recipes - so I decided it would be peaches and raspberries, which are still plentiful at the grocery store. I make crisps all year round, depending on what's in season. Add a scoop of French Vanilla ice cream and it's one of my favourite desserts!
Peach Raspberry Crisp before baking:


It should be cooled now, so I think it's time to make sure it turned out well... ;)
Peach Raspberry Crisp before baking:

and after...

It should be cooled now, so I think it's time to make sure it turned out well... ;)
Monday, August 30, 2010
I love feeding people, whether I bake it myself or not
Today we had a "thanks and goodbye" event for our current boss, before he returns to his "permanent" job in another district of our division. My former boss returns from another division some time late in September.
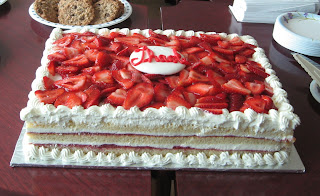
When I was planning this sendoff - because when you work for the boss you get to organize them for *everyone*! - I got a lot of "are you baking?" questions. My fans were sadly dissapointed. ;) For once, no home baked treats to add to an ordered cake since it was also Move Dear Daughter Part 2 Weekend. Fortunately, Longo's came to the rescue - I had ordered what was an absolutely scrumptious strawberry shortcake for 40 and every slice got eaten! This is not normal at office events and, as it turns out, this cake was the boss' favourite flavour which I didn't know beforehand. We commiserated about how neither of us likes Black Forest Cake, because with our shared heritage, we've both eaten waaaay too many of them. Normally I don't even like whipped cream, but today's cake was an exception.
I think I'll take pity on some of my buddies and take in some of the Sour Cream Blueberry Bundt Cake that I did end up making on Sunday night...I just didn't tell anyone about it yet. ;)
When I was planning this sendoff - because when you work for the boss you get to organize them for *everyone*! - I got a lot of "are you baking?" questions. My fans were sadly dissapointed. ;) For once, no home baked treats to add to an ordered cake since it was also Move Dear Daughter Part 2 Weekend. Fortunately, Longo's came to the rescue - I had ordered what was an absolutely scrumptious strawberry shortcake for 40 and every slice got eaten! This is not normal at office events and, as it turns out, this cake was the boss' favourite flavour which I didn't know beforehand. We commiserated about how neither of us likes Black Forest Cake, because with our shared heritage, we've both eaten waaaay too many of them. Normally I don't even like whipped cream, but today's cake was an exception.

I think I'll take pity on some of my buddies and take in some of the Sour Cream Blueberry Bundt Cake that I did end up making on Sunday night...I just didn't tell anyone about it yet. ;)
Thursday, August 26, 2010
It all starts with butter...
Last week I realized that I only had (gasp!) one pound of butter, cut into sticks, in my freezer. Now, if you don't bake, you'd think that this is plenty of butter for any household. Not so. If you bake, it's not uncommon to use two sticks at a time. I'm notorious for stockpiling baking supplies, but I'm very particular about what I'll buy now. Fortunately, Gay Lea butter was on sale at my local grocer and picked up three pounds - that should hopefully last until October but I may need more for the Hallowe'en bake sale.

I've learned that it's worth getting really good, unsalted butter to bake with. Gay Lea is my preferred choice and it's got to be unsalted. You can always add a pinch of salt to your dry mix, but once it's already in the butter, it's harder to control. When you're using it, it's also got to be very, very soft. I never knew how important this was until I realized that when you read "add the sugar to the creamed butter", it's so the sugar will dissolve completely into the butter, without a grainy texture. Since my butter is always rock hard from the freezer, I just leave it on the kitchen counter to defrost. Even if I take it out first thing in the morning and don't use it until after dinner, I won't refrigerate it again.
For anyone that says "but it's fattening!", think of how little butter you'll actually be eating in each cookie, slice of cake or bread or scone. Moderation people, it's all about moderation! ;) Nothing compares to that lovely buttery baked taste.
Sunday, August 22, 2010
Why I love the Barefoot Contessa so much
When I started baking from scratch four years ago, it was after watching many episodes of Ina Garten's "The Barefoot Contessa". To be perfectly honest, it wasn't her main courses that held my attention, but when she featured baking.

I had watched umpteen episodes of Martha Stewart baking, but it just seemed too intimidating to me - all those perfectly measured ingredients, laid out on a sheet tray on the counter waiting for her magical touch. With Ina, she reminded me more of how I work in the kitchen. There's flour on the counter, the ingredients are all over the place and the utensils just get dumped in the sink until I'm done mixing. Ina made it seem so much more fun and relaxed.
The most important things I learned from Ina where *why* certain things had to be done, why ingredients needed to be measured accurately and why you had to make sure temps were right before anything went into the oven. Until I watched her mix scones, I didn't know the reason butter had to be very cold was for the chemical reaction in the oven that caused the butter to melt and puff up those scones. Hey, I had no idea it was actually chemistry! ;)
I make many of her recipes absolutely as they were written, but have adapted some of them to suit my taste. Ina's carrot cake inspired my revised recipe, which has a lot more crushed pineapple, less oil and sugar and it's inhaled by my fans as soon as it's cooled.
I'm still looking forward to making her cranberry scones. :)
Saturday, August 21, 2010
My best friend thought of the name...

Why "The Bakers Daughter", you ask? Well, for those of you who've know me well or for many years, you know that my mother is an extraordinary baker. So much so that growing up I was too intimidated to try and bake anything that didn't come out of a box. That's sacrilege in my family. ;) Many of you have sampled my mum's goodies - whether it was during high school, at a bridal shower, or just hanging around my house sampling extra cookies after Christmas. My co-workers have also come love my mother, even though they've never met her. ;)
So, until four years ago, my most beloved kitchen tool, my red Kitchenaid mixer, only got used when my daughter would decide to bake - and she's a very good baker! After getting my first Barefoot Contessa cookbook (I LOVE Ina Garten) and watching her faithfully, I thought I'd give baking from scratch a try. It's safe to say that I haven't looked back.
I have to give props to my closest friend for coming up with the name for this blog - it absolutely fits who I am. Hopefully it's going to be a way to keep my friends updated on what I'm making, how my skills are progressing and just how much stuff the gang at the office is getting to try!
Now I have to start planning for my United Way Hallowe'en bake sale...
Subscribe to:
Posts (Atom)