Tuesday, March 25, 2014

When great expectations bomb...

When I got the Magnolia Bakery Cookbook, I thought their recipe for Cream Cheese Crumb Buns (try saying that three times!) looked delish.  The one drawback about this cookbook is the lack of photos, so it was also a leap of faith guessing what the final product would look like.

After making them yesterday, I'm not a happy little baker.  The last time I made anything so tasteless was two years ago with Martha Stewart St. Patrick's day recipes.  The ingredient list for the buns looked good, but in hindsight, there was nothing with any defined flavour in the recipe.  The other thing that irritates me today - it took three prep bowls!

Here's the recipe, if anyone is willing to try it:
Cream Cheese Crumb Buns from Magnolia Bakery

The quantity was listed as 16 "large" buns.  When my batter was mixed and I used my large scoop to measure them out, they only totalled 12 muffin cup sized "buns".  Maybe I measured too much batter?  The instructions called for 10 minutes of baking, followed by 1 tbsp of cream cheese filling added to the top, to be "pressed" into the buns with a tablespoon.  When I tried this, the filling ripped!  I decided to top each bun and lightly spread it out.  I topped this with a generous amount of the crumb topping and held my breath.  Usually, when you bake a crumb topping, the result is a lovely, toasty brown.  That's what you get when you mix brown sugar and butter, melted at a high heat, right?  Not so this time.  The crumb was cooked, but not toasty enough.  I think the recipe called for waaay too much flour in the mix.

Because I expected to take them to my office, I used muffin liners in the tray.  They were cool enough after 15 minutes to lift out and I gave one a try.  I'm guessing that because it was still warm the taste wasn't too bad.  When I packed them up later in the evening, I tried another one, which to me had little or no flavour!  Buns, meet my green bin!  Here they are, in all their beige glory, right before they become future compost.


If I'm going to spend an hour baking something, I'd like it to have a great taste when I'm done, especially after using an 8 oz package of cream cheese and 1-1/2 sticks of butter!  I'm not even going to bother tweaking this to try for a better outcome.  It's just time to take the post-it note off that recipe page and move on to something else.

Sunday, March 2, 2014

Stamped Almond Shortbread Cookies

Well gang, I think I'm on a roll again, baking *almost* every weekend!

I had seen this recipe on Pinterest for Valentine's Day and thought it would be fun to try when I remembered that I actually had a cookie stamp that was waiting to be used.  When you bake a lot, you end up with a lot of tools, some which sit neglected until you find the right recipe.

After pinning, I was cruising my favourite baking/food blogs and realized the pin came from Bake at 350.  They were bright pink for Valentine's Day, so that was an easy ingredient to skip.  I made a few alterations to the recipe - used regular salt, rather than Kosher and I doubled the amount of almond extract because I wanted a stronger taste.  My friends and co-workers loved them!  Sorry kids, I'll have to make them for you another time. ;)


Ingredients:
1 cup (2 sticks) unsalted butter, at room temp
3/4 tsp salt
3/4 cup granulated sugar
2 tsps almond extract
2-1/3 cups all purpose flour

Line 2 cookie sheets with parchment paper and preheat oven to 350 degrees.  As I've said before, and I'll say again - use parchment paper!  These cookies are very delicate when cooling and it's not worth messing up all your work for the little bit that parchment paper costs.

In large bowl of an electric mixer, beat the sugar, salt and butter together until fluffy.  Beat in the almond extract.  Scrape bowl to ensure all the sugar is incorporated into the butter.  On a low speed, add the flour, mixing until combined.  I always watch for the dough to pull cleanly away from the metal mixing bowl and stop at that point.

Roll dough into 2 inch balls.  Before stamping cookies, prepare a plate with flour to dip the stamp into, once for each cookie.  Even though my stamp is made of silicone, the dough will stick very badly without this step.  You can use a pastry brush to wipe off the excess flour, but I found just tapping the stamp onto the plate worked perfectly well.

Press the cookie stamp evenly into the centre of each dough ball.  There will be excess dough pressed out around the edge, which I trimmed off with a paring knife.  Once I trimmed the excess off the cookies, it was reused to easily make more dough balls.  The yield for this recipe was 15 cookies, which I didn't think was a lot, but given that they're 2-1/2 inches in size that made perfect sense.  I actually made 16, since my last was a messy "test" cookie for me to taste.  Since they are shortbreads they don't expand, so they easily fit onto the two baking sheets.

The recipe called for 12 minutes to bake, but my cookies felt very underdone (a light tap to the middle was my test), so I gave them a little longer and took them out to cool after 15 minutes of baking time.

One big cookie with everyone's coffee or tea made everyone very happy last week!

Friday, February 28, 2014

Nordic Ware - My favourite pans!

Anyone who has read my posts knows that I love making bundt cakes.  They're usually a one bowl recipe, can feed a crowd, keep really well and you can make them in just about any flavour imaginable.  In truth, I love most recipes that just take one bowl, like loaf cakes too.

A few years ago I discovered the joy of Nordic Ware pans.  This company created the origianl bundt pan and they've taken their creations to wonderful heights.  The pans are usually quite expensive, but when I find them on sale I snap them up!  They come in "standard" designs and flights of fancy for every conceivable occasion and holiday.  They're coated with non-stick finishes, but I never use them unless they've been liberally sprayed with non-stick coating.  I don't want to risk a cake breaking up when it's inverted to cool.  I've amassed quite a nice collection of these now and these are some of my favourites.

This was my first one was a real steal at Williams-Sonoma - I found the pumpkin patch loaf pan one December for $9.99, reduced from around $48!


My former boss was always very generous with gift cards at Christmas, which is why I didn't worry about a sale when I picked up the castle pan.  Both the girls and the guys in our family get a kick out of this one and it's been used for quite a few birthdays.  It looks really cute with flags on the tops of the towers and I'm looking for some knights in armour and a little dragon to use one day. ;)

In December 2012, Marshall's had reduced all their holiday items drastically, so I couldn't leave this one in the store, could I?  I used it back in early December 2013 with my triple almond chocolate cake recipe and just dusted it with confectioner's sugar for serving.  Really fitting for the season and the cake was rich enough not to need anything else, plus the details showed up really well with white.


(All photos courtesy Google.com)

The gingerbread cake with orange glaze was made in my most recent acqusition, the "Heritage" pan.  It made the most crisp, lovely edges on the bundt cake and, even though the cake was very tender, it removed from the pan absolutely cleanly.  You can see the results in my previous post and I know I'll be using that pan as one of my "regulars" in the future.

I highly recommend all of the Nordic Ware pans and don't expect to stop buying them any time soon!

Sunday, February 23, 2014

Gingerbread Bundt Cake with Orange Glaze

This past December I was really looking forward to making gingerbread cookies again, but the ice storm had other plans.  I'll definitely be making them early this coming December!

When we had our belated not-Christmas family dinner in January, I decided I wanted to make something with gingerbread flavour and decided it would be a cake.  I didn't have any recipe on hand that I wanted to try, so I found a recipe on the Ziploc site.  Who knew you could find recipes on a packaging manufacturer's site, but it was tied into holiday foods, so I guess that makes sense.  I changed quite a lot about the recipe.  It called for a LOT of fresh, grated ginger which is a really strong flavour and one I knew I didn't want to overwhelm a baked cake with.  Cooking with fresh ginger is one thing - biting into raw pieces in a cake is one I didn't want to taste!

Here's my version:


Dry Mix:
2-1/2 cups all purpose flour
2 tbsp cocoa powder, sifted
2 tsp baking powder
1 tsp salt
2-1/2 tsp ground ginger
1-1/2 tsp ground cinnamon
1/4 tsp ground nutmeg
1/4 tsp ground cloves

Wet Mix:
1-1/4 cup brown sugar, lightly packed (I used light sugar, but either is fine)
1/2 cup white granulated sugar
1/2 cup vegetable oil (don't use olive, since it will affect the flavour)
1/2 tsp baking soda
3 large, room temp eggs
1 cup room temp water
1/2 cup unsulfured molasses (not blackstrap)

Glaze:
2 cups confectioners' (powdered) sugar
1/4 cup milk or orange juice - I used juice, for the concentrated flavour
grated zest from one orange, to decorate after glazing

Preheat oven to 350 degrees.  Prepare a 12 cup bundt pan with non-stick baking spray or butter and flour really well.

In a medium bowl mix together the flour, cocoa powder, baking powder, salt and all the spices.  Set aside.  In a stand mixer, combine the two sugars, baking soda, eggs, water, oil and molasses.  Make sure you measure the molasses *after* the oil, so it will easily slide out of the measuring cup completely.  I actually wondered why the baking soda was included in the wet ingredients, rather than the dry, but realized it's for the chemical action required to have the cake rise properly.  After the wet ingredients are completely mixed, add the dry mixture and mix well.  Make sure to scrape the bowl all the way to the bottom so everything is thoroughly combined.

This will be a very liquid bundt batter, unlike most bundt mixtures.  Because of this, after you pour the batter into the bundt pan, you will need to tap the pan several times on the counter to release any air bubbles.  Bake for 45-50 minutes or until a skewer in the center comes out clean.  Although my oven runs hot, for this cake I actually did have to bake it for the full 50 minutes.

Cool the cake on a rack for 10 minutes before inverting and removing from pan.  Allow the cake to cool for 2 hours (no joke!), before glazing and decorating with the orange zest.

My family loved this!  I served it with whipped cream and they were happy to take leftovers with them after dinner.  It's another keeper that I'll make again next  year.

Sunday, December 29, 2013

Chocolate Toffee Shortbread Cups

Well, this Christmas week turned out to be one for the record books!  On December 21st at 9:45 pm EST, due to a very heavy freezing rain storm, our power went out.  This created a problem for this procastinator, because I had planned to bake on the 22nd!  The storm turned out to be the worst in Ontario's history and in my area of the city some residents are still waiting for electricity.  In addition to the ice, the thousands of damaged trees took out hydro lines and it's a long, slow process to repair them safely.

On to my dilemna...baking!  I thought that since I had "so much" time before Christmas, I wouldn't have to rush - ha!  I should have kept to my usual paranoid ways and started two weeks before, but not this year.  That's a mistake I won't make again, reinforced power grid or not!

Every year I like buying the December issue of Canadian Living, especially for the cookie and treat recipes.  Their recipes are tried and true and most that I've made have become family favourites.  This year I planned to make Lemon Curd Sandwich Cookies - which didn't happen - and Chocolate Toffee Shortbread Cups, which I made this morning.  They are a teenie treat and more like a candy than a cookie.


Ingredients for Shortbread Cups:
1 cup (2 sticks) unsalted, room temp butter
3/4 cup icing sugar
1/2 tsp vanilla
2 cups all-purpose flour

Toffee Chocolate Filling:
3/4 cup mini semi-sweet chocolate chips
3/4 cup toffee bits

In a stand mixer, blend all shortbread ingredients until fully incorporated.  Do not refrigerate.  Roll by 2 tsp increments, to make 48 balls of dough.  Because I love using my graduated baking scoops, I made sure I had the right amount and then scooped them all out very quickly.  This is enough for two mini muffin pans.  Press gently into the bottoms and up sides of mini muffin pans.  Refrigerate until firm, about 30 minutes.

Preheat oven to 325 degrees.  Once the cups are chilled, spoon rounded tsp into each cup.  Bake until edges are light golden, 20-25 minutes.  Because my oven gets quite hot, they were done in 20 minutes, so you should watch to make sure they don't over brown.  Allow to cool and then remove from pan gently, using the tip of a sharp knife to lift out the cups.

They're sweet, buttery and flaky.  I'll definitely make them again next year!  Now I just have to pick a weekend to use up a jar of Yorkshire Lemon Curd for those other cookies...

Friday, October 18, 2013

Apple Frangipane Galette and Lemon Curd Tartlettes

Well, I finally did it - I've conquered home made pastry dough!  With Thanksgiving approaching, I knew I couldn't put it off any longer and it was time to stop buying frozen Pillsbury pie dough.

Since Duncan has been part of the family, an apple dessert is always including in our Thanksgiving celebration.  You'll note I didn't say dinner - that's because we celebrate the European way, by having our coffee and cake (or other yummies) in the afternoon, long before we're too stuffed with dinner.  When my baking buddy Teresa and I were planning what we were making for the holiday, I decided I wanted to make a free form, rustic "pie" or a galette.  I had visions of the pie dough not rolling out properly, or being full of holes and I thought I could hide any issues more easily with a galette.  Teresa did a little Googling and found the filling recipe on Shawna Server's website for Apple Frangipane Galette.  My picture isn't great, but it tasted amazing!


About a month ago, I found a terrific little book at Marshall's in the kitchen section for $5.99 (you can also get it on Amazon for $15ish).  It's called "Cutie Pies" by Dani Cone and features nothing but mini pie recipes.  She also included recipes for butter, graham and savoury doughs and it looked pretty foolproof, or so I hoped.  As it turned out, the butter dough recipe worked flawlessly and I'll be using it from now on.  I made enough for 2 crusts because I was going to be using real lemon curd that Sarah and Jeff had brought me from England and wanted to make tartlettes.


Frangipane Base for Galette
4 ounces almond paste, crumbled (I bought mine at Bulk Barn)
1.5 tsp sugar
1.5 tsp all purpose flour
1/4 tsp almond extract
6 tbsp unsalted butter at room temperature
1 large egg at room temperature
1 tsp rum, Kirsh or Calvados (optional, I didn't use it)

All-Butter Pie Crust - for one double crust pie or 2 single crusts
2.5 cups all purpose flour
1 tsp salt
1 tsp granulated sugar
1 cup (2 sticks) unsalted butter, very cold, cut into 1/2 inch pieces
3/4 cup ice cold water

For filling and to finish Galette
6 medium Granny Smith apples (3 lbs), peeled, cored and sliced
2 tbsp unsalted butter, melted
4 tbsp granulated, Demerara or other coarse style sugar

I combined two methods - the instructions from Shauna Sever's site on assembling the dough along with the recipe from Cutie Pies.

Because my food processor isn't large enough, I used my stand mixer to combine the ingredients.  First measure the water into a measuring cup and leave it in the freezer to chill.  Cube the butter and have it ready to mix, keeping it in the fridge.  Using the paddle mixer, combine the dry ingredients.  Add the butter pieces and mix until the butter is the size of peas.  Add the water all at once and mix just until the dough comes together.  I shaped the dough into two disks, wrapped in plastic wrap and refrigerated them overnight.  You could also use it after 30 minutes, but I wanted to bake the morning of our holiday dinner.

Preheat oven to 375 degrees. When you're ready to bake, take the dough out and allow 15-30 miutes to soften enough to roll out.  While it rests on the counter, mix the frangipane filling.  Again, using the mixer, crumble the almond paste into small pieces.   Mix with the sugar, flour and almond extract in the bowl and mix until very well blended, then add the egg and liqueur, if using.  Mix until smooth, but don't worry if it doesn't look perfect.  It will "melt" as it bakes.

Prep a baking sheet with parchment paper and roll the dough into a 14" circle.  I knew I wasn't making very many tarts, so I'd be using more dough than a regular pie uses.  Roll your dough onto your rolling pin and transfer it to the baking sheet.  Spread the frangipane into a 10-12 inch sized circle and top with the apples.  Since the galette is folded over the apples, I dusted the apples that would be under the crust with a few teaspoons of sugar.  Then fold the pastry dough around the galette.  It's easy to even it out so that the dough is distributed easily.  Take your melted butter and brush the dough *and* the apples, until it's all used.  Sprinkle the dough and uncovered apples with sugar and bake for one hour.  The apples will actually collapse quite a bit, with is why my galette looks like there's a huge gap between the crust the apples.

It was lovely - flaky, buttery and the frangipane is a lovely hint of almond, rather than a strong taste.  The real, British lemon curd was such a treat!  I'm glad I still have half a jar left to enjoy another time soon.

Sunday, September 1, 2013

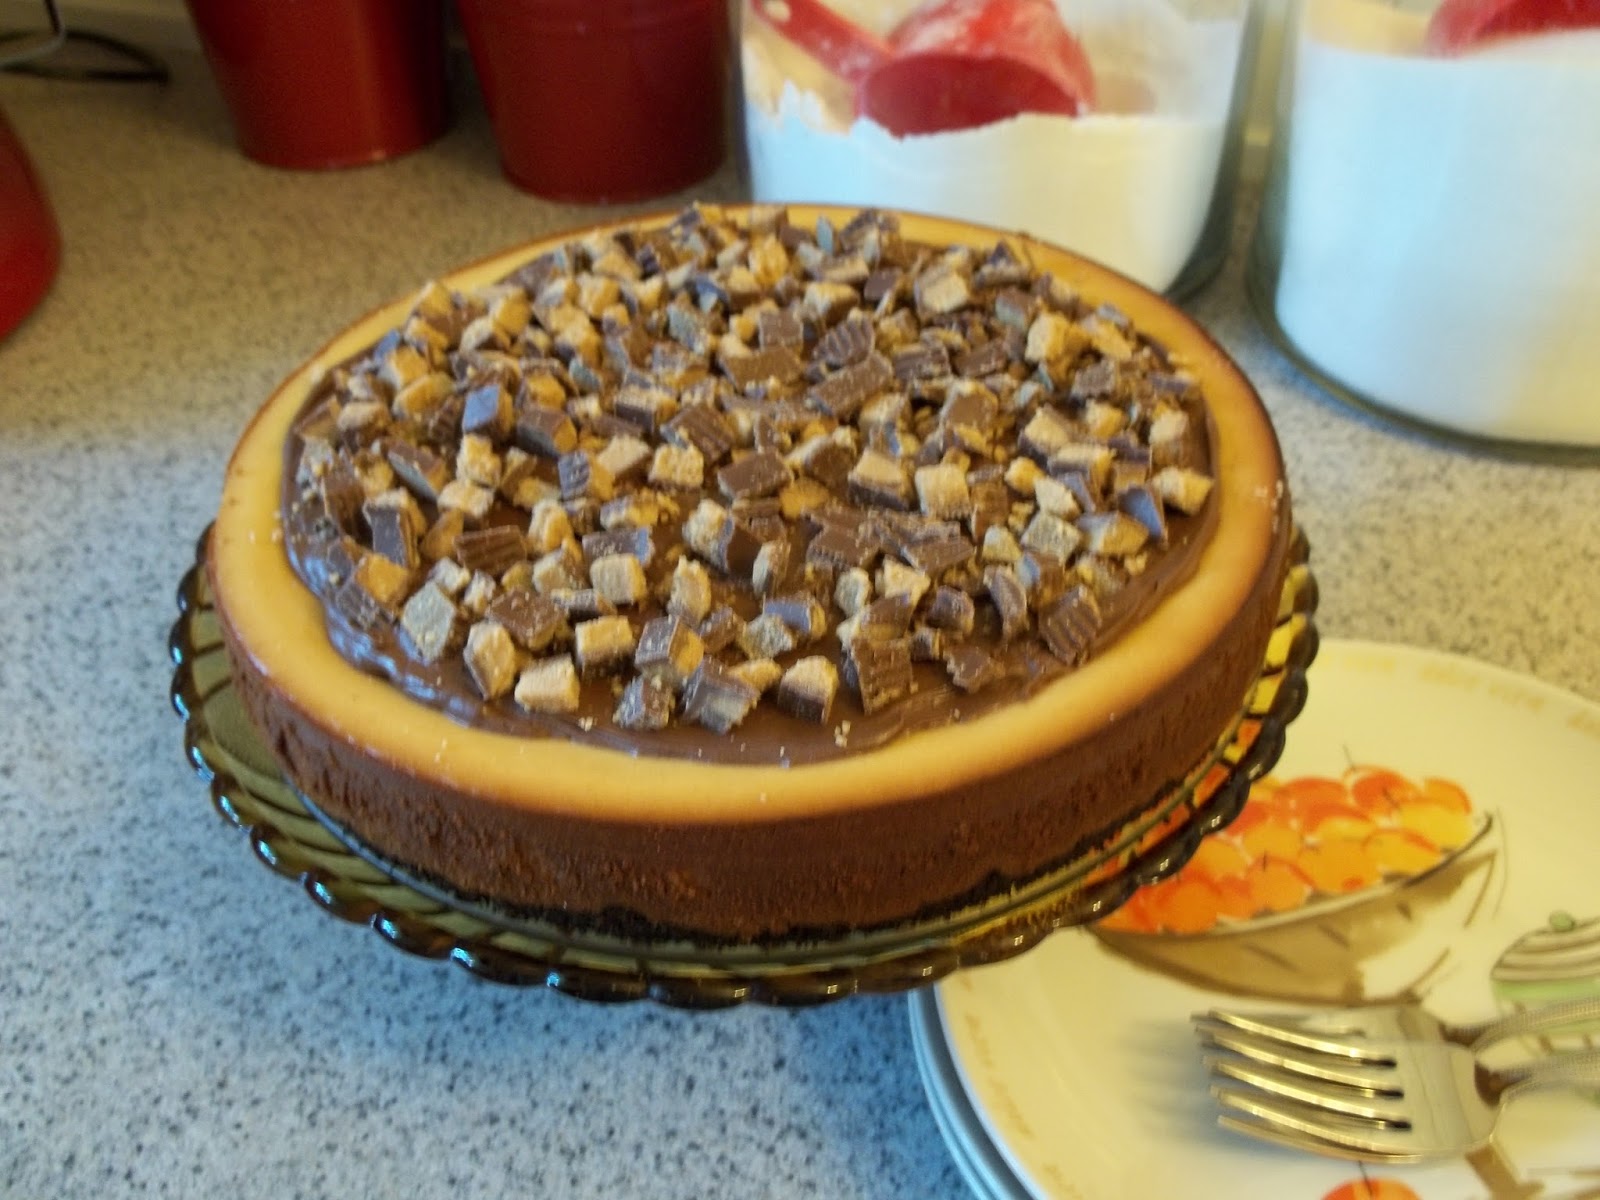
Peanut Butter Chocolate Cheesecake

There are lots of times when we all feel awful, whether it's because of work, family issues or just life in general.  The last two weeks have been very hard - we said goodbye to our sweet little pup almost two weeks ago and I've been having a very hard time without my little shadow to keep me company.

When I was visiting my lovely daughter and son-in-law yesterday, I was raving about a recipe I'd made for my younger daughter and her beau, which got the reaction "That's a keeper!"  I said I hadn't blogged in a long time and Megan encouraged me to start again, with this recipe.  She also doesn't like cheesecake, but after describing this, she now wants to try it!  Wonders will never cease...  After making an apple bundt cake this afternoon for a friend's visit tomorrow, I realized Megan was right and that it was time to blog again, because I really do love to share my recipes and results.

I got the original recipe, Reese's Peanut Butter Chocolate Mini Cheesecakes from 
Gimme Some Oven and a did a test run on my office buddies.  The reaction was great - my baker buddy Teresa's comment was (basically one word) "OmigoodIloveitcanIhavetherecipe?"  I only took 8 to the office and they were a universal hit.  The recipe said it could also be made as an entire cheesecake and I thought I'd try it that way, since it was actually less work to make one cake rather than a tray of minis.

 No surprise here, but of course I amended the recipe by reducing the fat content, increasing the crust base (essential!) and not making ganache as a topper.  Everyone loved it, so I'll keep making it this way!


Ingredients for Crust:
2 cups chocolate cookie crumbs - I got mine at Bulk Barn
4 tbsp melted butter

Cheesecake Ingredients:
2 bricks (16 oz or 500 grams) reduced fat, plain cream cheese
1/2 cup smooth peanut butter
3/4 cup light brown sugar, firmly packed
2 eggs, at room temperature
1/4 cup light cream - I used 5% coffee cream
1/2 tsp vanilla extract

Topping:
Prepared chocolate icing, 1/2 to 3/4 cup worth
Reese's Peanut Butter Cups, diced - I used 7 from a 12 pack

Preheat oven to 350 degrees.  In a medium bowl, whisk together the cookie crumbs and melted butter until thoroughly mixed.  In  8-9" springform pan, spread the crumb mixture evenly and bake for 10 minutes.  Allow to cool thoroughly while the filling is prepared.

In a large mixer bowl combine the cream cheese and peanut butter at medium speed, until smooth.  You will need the scrape the bowl at least once to make sure it's evenly mixed.  Add the brown sugar, followed by the eggs one at a time, then the cream and vanilla.  Scrape the bowl again to make sure everything is incorporated.  Pour over cooled crumb base.

At this point there are two trains of thought about baking cheesecake.  The traditional method is to use a "Bain Marie", or water bath, where the springform pan is wrapped in foil and set into a pan filled 2/3 of the way with heated water.  The cheesecake then bakes in this "bath" and you pray that there isn't even a teenie, tiny hole anywhere in the foil, because if there is it's curtains for your cheesecake.

I used another method and will do it again this way.  Instead of setting the springform into the pan of water, I put the water bath on the rack under the one with the cheesecake on it.  The theory is that the moist air in the oven will prevent the cheesecake from cracking, because it takes so long to bake and set.  Even with the pan in the water, I've had them crack.  With this cheesecake, a small crack formed along the inside of the pan, but I knew it would be covered by icing, so I wasn't worried.

Bake the cheesecake for 45 minutes, then allow to sit in the cooling oven for another hour to fully set.  There is no way to cut back on the time with this step, so don't even consider it.  ;)  At this point, it will need to be chilled at least four hours or overnight for the flavour to fully develop.  This is also the real reason cheesecakes don't get made that often - you need to plan ahead!

The next day, I warmed prepared chocolate icing for 10-15 seconds in the microwave and very gently spread it over the top, completely covering the "fault line". ;)  The diced peanut butter cups were spread out immediately so they'd stick and that was it!  It sliced beautifully, so you could potentially get 12 slices out of one pan, but ours didn't go that far.  I'm pretty sure I'll be making it again on Thanksgiving weekend!