Wednesday, August 19, 2015

Why I'll always buy printed cookbooks

Despite the fact that I do almost all my fiction reading in ebook format now, I still love my old favourites and new cookbooks.  Specifically, those that focus exclusively on baking.  When I feel I need inspiration, I'll turn to those I already have worked for me many times, but sometimes I'll find a book that is just too tempting not to add to my collection.  I've donated books that didn't have enough photos because what most bakers (like me) want to see is what the finished product should look like.  And, if we're being perfectly honest, beautiful cookbooks are food porn - it's no different than why we watch the Food Network, right? ;)

I recently bought the most beautiful book for my good friend and baking buddy Teresa.  Butter is by Rosie Daykin, a Canadian baker with two shops in Vancouver, BC.  The book is gorgeous - the photography and layout make you (me?) want to bake everything in there!  Apart from the recipes, the look of the book so pretty - nostalgic rose print end papers and a lovely green satin bookmark ribbon.  Teresa was thrilled with her birthday gift and I decided I liked it so much that I had to get one for myself.  It features so many traditional Canadian recipes, like Nanaimo bars and butter tarts and I especially loved the suggestion to add Smarties to cookies - you can't get much more Canadian than that!


All book images courtesy Amazon.ca
 
Earlier this summer I also picked a baking book by a reliable source - Better Homes and Gardens Baking.  While some of the recipes might not be that innovative, they are reliable, which is what I want in baking recipes.  You can't go wrong with this book either and it's a great help having the basics on hand when you need a reference.
 
 
I bought Flour: A Baker's Collection of Spectacular Recipes after reading Bakerella's review a few years ago and being especially intrigued with the homemade Oreo recipe.  The mixed berry scones also looked delish.  I'm hoping to try both recipes this fall.
 
 
One of my most reliable baking guides is the Complete Canadian Living Baking Book: The Essentials of Home Baking.  I went to a demonstration by Elizabeth Baird, the author of this book and learned so much there that I had to get the book.  It's never disappointed me whether it's trying a new recipe or checking in the "essential" section to clarify a technique.
 
 
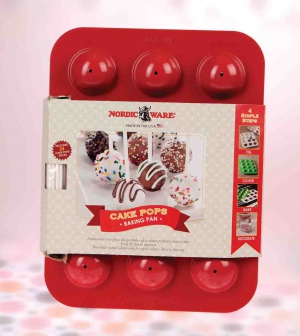
The other little item I find inspiring and have been wanting to try for ages is the Nordic Ware Cake Pops Pan.  I found a great deal at Homesense (Homegoods to my US friends) - how could I pass up this pan for $7, especially when they are my favourite baking pans by far.

Image courtesy Google.com

With an upcoming family birthday and Thanksgiving in October, I'm already planning what I want to make next this fall.


Tuesday, August 18, 2015

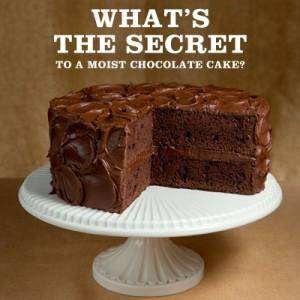
Super Moist Chocolate Cake - with a secret ingredient!

My son-in-law Duncan recently celebrated his birthday and I volunteered to make his cake.  My daughter Megan asked me to make it chocolate and I remembered this recipe.  It's an oldie, but a goodie and has an ingredient most people wouldn't associate with cake - mayonnaise!  Because there is no butter or oil used in the cake, the mayonnise is what replaces the fat.

I first made this cake in the 1980's using a version with cake mix as a base.  I've evolved since those days and knew I'd be making this version from scratch.  It's right from the Hellman's website and I didn't change a single thing.  The reason I'm not using a photo of my finished cake is because the icing didn't want to co-operate with the hot weather that day and slid right off the cake!  No-one cared because it still tasted great, even if I did have to scoop up a bit of icing for each slice.

It's a great cake - lovely and moist, with deep dark chocolate flavour.  It sliced beautifully and with an added scoop of vanilla ice cream made everyone very happy.


Image Courtesy Google.com
Here are the details from the Hellman's website.  It's not necessary to use this brand, but it's my favourite.  I used the reduced fat version and it didn't affect the final product at all.
Ingredients
  • 2 cups all-purpose flour                      
  • 2/3 cup unsweetened cocoa powder - make sure to sift it to eliminate lumps 
  • 1 1/4 tsp. baking soda
  • 1/4 tsp. baking powder
  • 3 eggs
  • 1 2/3 cups sugar
  • 1 tsp. vanilla extract
  • 1 cup Hellmann's® Real Mayonnaise
  • 1 1/3 cups water

Directions

  1. 1. Preheat oven to 350°. Grease and lightly flour two 9-inch round cake pans; set aside.
  2. In medium bowl, combine flour, sifted cocoa, baking soda and baking powder; set aside.
  3. In large bowl, with electric mixer at high speed, beat eggs, sugar and vanilla for 3 minutes or until light and fluffy. Beat in mayonnaise at low speed until blended. Alternately beat in flour mixture with water, beginning and ending with flour mixture. Pour into prepared pans.
  4. Bake 30 minutes or until toothpick inserted in centers comes out clean. My oven runs hot, so it only needed 25 miutes, so adjust the time according to your stove.  On wire racks, cool 10 minutes; remove from pans and cool completely. Frost, if desired, or sprinkle with confectioners sugar.

Hope you enjoy it as much we all did!

Friday, August 14, 2015

To tweak or not to tweak, that is the question...

When I first started baking from scratch 8 years ago, I was too afraid to ever deviate from the way a recipe was written.  The more I baked, the more comfortable I got and that's when my tweaking of recipes started.

What I love about baking, for the most part, is how precise it is if you don't mess with the active ingredients, the only things you *can't* tweak!


Image Courtesy Google.com

Once I learned this, it got easier to adjust recipes to suit my and my family's tastes.  My first major success was with Ina Garten's Carrot Cake recipe.  I loved the ingredients, but didn't agree with the quantity of some of the ingredients.  If you're adding pineapple, why does it have to be in such big chunks?  Why is there so much vegetable oil and sugar in the recipe?  After about four tries, it became my Carrot Cake recipe, as inspired by the lovely Ina.  Just as yummy, but with much more crushed pineapple, and drastically less oil and sugar so it was as tasty and moist as the original.

Now when I bake, I have no hesitation in changing the type and quantity of spices listed or swapping out ingredients like fruits and nuts.

Saturday, August 1, 2015

Carrot Zucchini Bars

I found this recipe at Better Homes and Gardens online and thought it might appeal to my co-workers, which it did!  They were so easy to make - I didn't even need to use Big Red.  Here's the original recipe, but of course I couldn't resist tweaking it.


Image Courtesy BHG.com

Mine didn't look as pretty as these.  I used a pan that was a little too large, so they needed more height, but they still tasted great.  I didn't add the raisins, since most of my buddies don't like them, so I increased the walnuts to 3/4 cup.   Instead of a half tsp of ground ginger, I used 1/4 tsp each of ginger and cinnamon.  It's a less intense flavour, but when I asked all my taste testers if if needed more ginger, they thought it was perfect.  I also copped out and used container cream cheese frosting with pure orange extract.  Everyone loved the frosting!  I'll be making these again for sure.

Ingredients 

1-1/2 cups flour
1 tsp baking powder
1/4 tsp baking soda
1/4 tsp each ground ginger and cinnamon
2 eggs, slightly beaten
1 small zucchini, shredded, approx. 1 cup.  I found a medium was too much.
1-1/2 cups shredded carrot
3/4 cup chopped walnuts
3/4 cup packed brown sugar
1/4 cup liquid honey
1/2 cup cooking oil
1 tsp vanilla
3/4 container cream cheese frosting
1 tsp finely grated orange or lemon peel OR pure lemon or orange extract

Preheat oven to 350 degrees.  Prepare a 13 x 9 inch baking pan by either lining with parchment paper (my preferred method), or using a baking spray.

In a large bowl, combine flour, baking powder, baking soda, ginger and cinnamon.  Whisk to combine.  In another large bowl, combine beaten eggs, brown sugar, oil, honey, vanilla, carrots and zucchini until thoroughly mixed.  Add wet to dry ingredients until just combined.  You don't want to overmix or the squares will be tough.

Spread evenly in baking pan and bake for 25 minutes, or until a toothpick in the centre comes out clean.  Cool completely on a wire rack before removing.  Using the parchment paper allows you to lift the entire thing out before slicing, which is why I prefer it over just spraying the pan.

I like to warm the prepared frosting in the microwave for 30 seconds then add the extract or zest, which allows it to incorporate evenly.  Once it's completely cooled, frost the entire pan worth before cutting into squares.  I cut it into 24 generous sized pieces and boy, were they gone fast.

Finding Inspiration

My poor, neglected little blog!  I thought for sure  I'd be writing long before these last 13 months, but I haven't felt inspired at all.  It's not that I haven't been baking or trying out new recipes, but I nothing felt interesting or tasty enough to share.  Sometimes you need to discover a new source to give you a kick start and I found a British competition on PBS that I just love.

The Great British Baking Show is wonderful!  It's a competition, but the hosts are charming, not mean and the bakers treat each other with respect, not undermining each other.  It's aired in the UK already, but we're down to the last five bakers in the show as of this week.


Another unexpected source of inspiration came from a dear friend, who found a single calendar page and sent it to me.  It's designed by Caitlin McClain of Little Low - I love her designs so much I think I need to buy something!  It's a simple phrase, but something I'll be framing for my kitchen:

"Good things come to those who bake."

Just perfect and it summarizes WHY I bake.  Now, off to find some new recipes!


Monday, July 7, 2014

Chunky Monkeys

Sometimes when you don't spend a lot of a money on a cookbook, you luck out.  I picked up "The Cookie Bible" a while ago for only $6 when one of my favourite bookstores was closing for, based on how cute the cookies looked.  As it turned out, this recipe was delish too!

In addition to blueberries and lemon, the other flavour combo that's always a hit in my family is bananas with chocolate chips.  Add some walnuts and you can't go wrong in a cookie!  After making over 3 dozen, by late afternoon and family visiting during the day and send some home with my daughter and son-in-law, there were only TEN cookies left!  So much for my plan to share them with my co-workers. ;)


As usual, since it was the first time baking these, I followed the instructions exactly, even though I found the 300 degree setting for the oven very low.  The cookies took longer to bake than instructed, but they did turn out perfectly - soft and tender!

Ingredients:
2-2/3 cups flour
1/2 tsp baking soda
1/4 tsp salt
1 cup (2 sticks) softened butter
1 cup packed light brown sugar
1/2 cup granulated sugar
1 cup mashed bananas - use ripe, but *not* brown bananas for better cookie structure
1 egg
1/2 tsp banana extract, if you have it.  I don't so I used pure vanilla extract instead.
1-1/2 cups dark chocolate chips
1 cup chopped walnuts

Preheat oven to 300 degrees.  Whisk flour, baking soda and salt in bowl and set aside.  In a stand mixer, combine butter and both sugars until light and fluffy.  Add banana, egg and vanilla extract (or banana) and beat until just blended.  As usual, take time to scrape the bowl completely to ensure all ingredients are incorporated.

Add flour mixture until just blended.  Slowly mix in chocolate chips and walnut pieces.  This will be a rather wet dough, so I used my tablespoon scoop with a glass of hot water to dip the scoop into between measures.  Space evenly on parchment lined baking sheets.  I was worried that the cookies would run together while baking, but they held their shapes nicely.

The recipe called for baking them for 20 minutes or until the edges were lightly browned.  At 20 minutes, I tapped a cookie from the first batch lightly and could tell it wasn't baked yet.  I gave them another 4 minutes and they were perfect.  My second batch was perfect at 12 minutes per rotation (i.e., switch the pans for even baking through the process).

For once, I didn't count exactly how many this cookie dough yielded.  I'm going to guess at least 4 dozen, but boy did they go fast!  My daughter commented that "these are dangerous because they're not that sweet, so you could eat 20 of them before you realized how many you had."  I'll take that as an endorsement to make them again.

Sunday, June 29, 2014

My Very Own Bag End

There are times in your life when you don't want to bake, no matter how much you enjoy it.  Deciding to throw your own fundraising milestone birthday party is one of them.

This year I reached the age 60 milestone along with a number of my good friends.  Originally I wasn't happy about it at all, so I wanted to turn a negative feeling into something positive.  I've been a supporter of Habitat for Humanity for a long time (and yes, I've worked on a build) so I decided to tie it into one of my other loves, that is anything Tolkien-related.  This gave me the theme for the party - Hobbits for Habitat!  When you reach this age in your life, you really don't need a lot of "stuff", so I asked my family and friends to donate to Habitat in lieu of gifts.  I have to say that everyone was very generous with their donations and I truly did appreciate the flowers I received on the day of the party.

My gift to myself was a custom Bag End cake.  If you know Tolkien, you'll know that Bag End is the home of both Bilbo and Frodo Baggins, the two most famous Hobbits in Tolkiens books.  My girls have jokingly called me a Hobbit for years, given that I'm height challenged and if I could, I'd move right into Bag End if it existed in Toronto. ;)  This cake was my closest facsimile, created by Sam Anderson of Cakes Cove:

(Photo courtesy George Winter - thanks!)

You can see mini Bilbo and mini Bella Gamgee (me!) having tea and cake on their picnic blanket.  Those decorations are made of gum paste and will keep forever - I just have to find a little clear box to put them in, to keep in my kitchen.

Everyone was just blown away by the detail of the cake and the fact that the entire thing was edible.  The tree was solid chocolate, as was the rail fence, the benches in front of the door and the stonework around the door and window.  Everything was absolutely delicious - the combo of chocolate cake with mocha truffle filling was a real hit!  Deciding not to bake my own cake was probably the best party idea I had and I know that everyone appreciated it almost as much as I did.


Sunday, May 25, 2014

Lemon Swirl Cheesecake

On Mother's Day Sunday, my daughter Sarah treated my mum, the family and I to a lovely brunch - it was all delicious!  I've been baking again and decided I wanted to make on Saturday night something sweet to end the meal.  Since I already had cream cheese at home, I decided to try a Martha Stewart recipe from the "Cakes" cookbook I bought and had Martha sign at the Delicious Food Show last October.

The last cheesecake I've made a few times with great success is Chocolate Peanut Butter, which uses two packages of cream cheese.  Silly me, I thought the Martha recipe would need the same amount - wrong!  Despite reading through the recipe for Lemon Swirl Cheesecake, I completely skimmed over the TWO pounds of cream cheese required - that's four packages! - until I was ready to add the two packages I had at room temp to the mixing bowl.  I decided to go ahead with the recipe, but adapt the amount of sugar used and hoped it would still work.  Of course, with only half the cream cheese, it was a lot lower in the pan, but very tasty.  The family loved it and said they'd like to have it again.


Ingredients for the Crust:
1 cup graham cracker crumbs
2 tbsp unsalted butter, melted
2 tbsp sugar

Revised Ingredients for the Filling:
2 8-ounce bars cream cheese (I always use the "light" version)
3/4 cup granulated sugar
1 tsp vanilla extract
pinch of salt
2 large eggs, at room temp
1 cup Lemon Curd - I had a jar of Yorkshire curd at home, so I didn't make it from scratch

Preheat oven to 350 degrees.  I neglected to line the bottom of my 9" springform pan with parchment paper, as noted in the recipe, and I regretted it later.  It does help the crumb stay together when you're cutting slices, so I wouldn't skip this the next time.

Stir the crumbs, melted butter and sugar together and press mixture firmly into the bottom of your pan.  Bake until set, about 10 minutes.  Allow to cool *completely* before adding the filling.

Reduce oven temp to 325 degrees.  In your mixer bowl, beat the cream cheese until fluffy and smooth, about 3 minutes.  Reduce to low speed and add sugar in a slow, steady stream.  Add the salt and vanilla, beat until well combined.  Add the eggs, one at a time, beating after each until just combined - do not overmix.  Make sure that you keep scraping the bowl throughout, so that all the ingredients are fully incorporated.  Pour filling over cooled crust.

Drop lemon curd in small dollops over top of filling.  To make this easier, I warmed my lemon curd in the microwave for about 10-15 seconds, since it can harden up quite a bit in the fridge and make this step a mess!  With a wooden skewer or toothpick, swirl the filling together over the top of the cake.

Now, since I don't use the Bain Marie bath method, I had my baking pan filled with water already set on the lower oven rack, to create the humidity required in the oven.  For this quantity, I baked the cheesecake for 65 minutes and allowed it to cool completely in the oven for at least another hour with the door opened.  I refrigerated it overnight and took it out before brunch to allow it to reach room temp.  It was garnished with fresh raspberries, which made a lovely sweet/tart combo.  Definitely a recipe I'll make again, even though I didn't use two pounds of cream cheese!

Saturday, May 17, 2014

Ombre Pink Lemonade Birthday Cake

This year my sweet daughter Sarah celebrated a milestone birthday, her 25th!  Sarah is not one for change, which means that when I ask what flavour of cake she'd like for her birthday, in the past it's always been one of two types - triple chocolate almond or boxed rainbow sprinkle vanilla.  You can't beat the classics, can you?  However, this year the answer was different - "surprise me!"  I said that I wanted to try a pink lemonade for a while and she thought it sounded good, so I gave it a try.


The first recipe variation I'd read about was from Better Homes and Gardens, but the bakers' feedback online was not good at all.  I've been cautious lately about new recipes, after my most recent failure, so I appreciate the feedback from other bakers.  I dislike recipes that are overly sweet and the BHG recipe called for marshmallow Fluff as the icing base - that is WAY too sweet for me!  Searching online I found a recipe from good old Betty Crocker, which had great feedback.  Although the recipe was for cupcakes, it was easily adapted into a layer cake.  Here's Betty's version of Pink Lemonade Cupcakes.

What you need (as noted in the recipe) is a white/vanilla cake mix and prepared vanilla icing.  The flavour comes from the frozen pink lemonade concentrate.  Once the batter was prepared, I tinted all of it pale pink and used half the batter for the first layer.  I added more pink colour to the remaining batter to get the darker colour for the second layer.  It was my first time using gel pink colour, which is so easy to use.  A little goes a very long way, so using a toothpick to add the colour was the best technique.  Once the layers were baked and completely cooled, I placed a line of toothpicks around the layers as the guide to slice them into two halves, to get the ombre effect.

The next time I make it, will add less of the concentrate to the icing, because it became too runny.  After icing the cake, I put it back into the fridge right away to set a bit.  Once it hardened, I added the pink pearl beads (actually crispy rice bits) to decorate the top.  The flavour and the decoration got rave reviews with requests to make it again.


Tuesday, March 25, 2014

When great expectations bomb...

When I got the Magnolia Bakery Cookbook, I thought their recipe for Cream Cheese Crumb Buns (try saying that three times!) looked delish.  The one drawback about this cookbook is the lack of photos, so it was also a leap of faith guessing what the final product would look like.

After making them yesterday, I'm not a happy little baker.  The last time I made anything so tasteless was two years ago with Martha Stewart St. Patrick's day recipes.  The ingredient list for the buns looked good, but in hindsight, there was nothing with any defined flavour in the recipe.  The other thing that irritates me today - it took three prep bowls!

Here's the recipe, if anyone is willing to try it:
Cream Cheese Crumb Buns from Magnolia Bakery

The quantity was listed as 16 "large" buns.  When my batter was mixed and I used my large scoop to measure them out, they only totalled 12 muffin cup sized "buns".  Maybe I measured too much batter?  The instructions called for 10 minutes of baking, followed by 1 tbsp of cream cheese filling added to the top, to be "pressed" into the buns with a tablespoon.  When I tried this, the filling ripped!  I decided to top each bun and lightly spread it out.  I topped this with a generous amount of the crumb topping and held my breath.  Usually, when you bake a crumb topping, the result is a lovely, toasty brown.  That's what you get when you mix brown sugar and butter, melted at a high heat, right?  Not so this time.  The crumb was cooked, but not toasty enough.  I think the recipe called for waaay too much flour in the mix.

Because I expected to take them to my office, I used muffin liners in the tray.  They were cool enough after 15 minutes to lift out and I gave one a try.  I'm guessing that because it was still warm the taste wasn't too bad.  When I packed them up later in the evening, I tried another one, which to me had little or no flavour!  Buns, meet my green bin!  Here they are, in all their beige glory, right before they become future compost.


If I'm going to spend an hour baking something, I'd like it to have a great taste when I'm done, especially after using an 8 oz package of cream cheese and 1-1/2 sticks of butter!  I'm not even going to bother tweaking this to try for a better outcome.  It's just time to take the post-it note off that recipe page and move on to something else.

Sunday, March 2, 2014

Stamped Almond Shortbread Cookies

Well gang, I think I'm on a roll again, baking *almost* every weekend!

I had seen this recipe on Pinterest for Valentine's Day and thought it would be fun to try when I remembered that I actually had a cookie stamp that was waiting to be used.  When you bake a lot, you end up with a lot of tools, some which sit neglected until you find the right recipe.

After pinning, I was cruising my favourite baking/food blogs and realized the pin came from Bake at 350.  They were bright pink for Valentine's Day, so that was an easy ingredient to skip.  I made a few alterations to the recipe - used regular salt, rather than Kosher and I doubled the amount of almond extract because I wanted a stronger taste.  My friends and co-workers loved them!  Sorry kids, I'll have to make them for you another time. ;)


Ingredients:
1 cup (2 sticks) unsalted butter, at room temp
3/4 tsp salt
3/4 cup granulated sugar
2 tsps almond extract
2-1/3 cups all purpose flour

Line 2 cookie sheets with parchment paper and preheat oven to 350 degrees.  As I've said before, and I'll say again - use parchment paper!  These cookies are very delicate when cooling and it's not worth messing up all your work for the little bit that parchment paper costs.

In large bowl of an electric mixer, beat the sugar, salt and butter together until fluffy.  Beat in the almond extract.  Scrape bowl to ensure all the sugar is incorporated into the butter.  On a low speed, add the flour, mixing until combined.  I always watch for the dough to pull cleanly away from the metal mixing bowl and stop at that point.

Roll dough into 2 inch balls.  Before stamping cookies, prepare a plate with flour to dip the stamp into, once for each cookie.  Even though my stamp is made of silicone, the dough will stick very badly without this step.  You can use a pastry brush to wipe off the excess flour, but I found just tapping the stamp onto the plate worked perfectly well.

Press the cookie stamp evenly into the centre of each dough ball.  There will be excess dough pressed out around the edge, which I trimmed off with a paring knife.  Once I trimmed the excess off the cookies, it was reused to easily make more dough balls.  The yield for this recipe was 15 cookies, which I didn't think was a lot, but given that they're 2-1/2 inches in size that made perfect sense.  I actually made 16, since my last was a messy "test" cookie for me to taste.  Since they are shortbreads they don't expand, so they easily fit onto the two baking sheets.

The recipe called for 12 minutes to bake, but my cookies felt very underdone (a light tap to the middle was my test), so I gave them a little longer and took them out to cool after 15 minutes of baking time.

One big cookie with everyone's coffee or tea made everyone very happy last week!

Friday, February 28, 2014

Nordic Ware - My favourite pans!

Anyone who has read my posts knows that I love making bundt cakes.  They're usually a one bowl recipe, can feed a crowd, keep really well and you can make them in just about any flavour imaginable.  In truth, I love most recipes that just take one bowl, like loaf cakes too.

A few years ago I discovered the joy of Nordic Ware pans.  This company created the origianl bundt pan and they've taken their creations to wonderful heights.  The pans are usually quite expensive, but when I find them on sale I snap them up!  They come in "standard" designs and flights of fancy for every conceivable occasion and holiday.  They're coated with non-stick finishes, but I never use them unless they've been liberally sprayed with non-stick coating.  I don't want to risk a cake breaking up when it's inverted to cool.  I've amassed quite a nice collection of these now and these are some of my favourites.

This was my first one was a real steal at Williams-Sonoma - I found the pumpkin patch loaf pan one December for $9.99, reduced from around $48!


My former boss was always very generous with gift cards at Christmas, which is why I didn't worry about a sale when I picked up the castle pan.  Both the girls and the guys in our family get a kick out of this one and it's been used for quite a few birthdays.  It looks really cute with flags on the tops of the towers and I'm looking for some knights in armour and a little dragon to use one day. ;)

In December 2012, Marshall's had reduced all their holiday items drastically, so I couldn't leave this one in the store, could I?  I used it back in early December 2013 with my triple almond chocolate cake recipe and just dusted it with confectioner's sugar for serving.  Really fitting for the season and the cake was rich enough not to need anything else, plus the details showed up really well with white.


(All photos courtesy Google.com)

The gingerbread cake with orange glaze was made in my most recent acqusition, the "Heritage" pan.  It made the most crisp, lovely edges on the bundt cake and, even though the cake was very tender, it removed from the pan absolutely cleanly.  You can see the results in my previous post and I know I'll be using that pan as one of my "regulars" in the future.

I highly recommend all of the Nordic Ware pans and don't expect to stop buying them any time soon!

Sunday, February 23, 2014

Gingerbread Bundt Cake with Orange Glaze

This past December I was really looking forward to making gingerbread cookies again, but the ice storm had other plans.  I'll definitely be making them early this coming December!

When we had our belated not-Christmas family dinner in January, I decided I wanted to make something with gingerbread flavour and decided it would be a cake.  I didn't have any recipe on hand that I wanted to try, so I found a recipe on the Ziploc site.  Who knew you could find recipes on a packaging manufacturer's site, but it was tied into holiday foods, so I guess that makes sense.  I changed quite a lot about the recipe.  It called for a LOT of fresh, grated ginger which is a really strong flavour and one I knew I didn't want to overwhelm a baked cake with.  Cooking with fresh ginger is one thing - biting into raw pieces in a cake is one I didn't want to taste!

Here's my version:


Dry Mix:
2-1/2 cups all purpose flour
2 tbsp cocoa powder, sifted
2 tsp baking powder
1 tsp salt
2-1/2 tsp ground ginger
1-1/2 tsp ground cinnamon
1/4 tsp ground nutmeg
1/4 tsp ground cloves

Wet Mix:
1-1/4 cup brown sugar, lightly packed (I used light sugar, but either is fine)
1/2 cup white granulated sugar
1/2 cup vegetable oil (don't use olive, since it will affect the flavour)
1/2 tsp baking soda
3 large, room temp eggs
1 cup room temp water
1/2 cup unsulfured molasses (not blackstrap)

Glaze:
2 cups confectioners' (powdered) sugar
1/4 cup milk or orange juice - I used juice, for the concentrated flavour
grated zest from one orange, to decorate after glazing

Preheat oven to 350 degrees.  Prepare a 12 cup bundt pan with non-stick baking spray or butter and flour really well.

In a medium bowl mix together the flour, cocoa powder, baking powder, salt and all the spices.  Set aside.  In a stand mixer, combine the two sugars, baking soda, eggs, water, oil and molasses.  Make sure you measure the molasses *after* the oil, so it will easily slide out of the measuring cup completely.  I actually wondered why the baking soda was included in the wet ingredients, rather than the dry, but realized it's for the chemical action required to have the cake rise properly.  After the wet ingredients are completely mixed, add the dry mixture and mix well.  Make sure to scrape the bowl all the way to the bottom so everything is thoroughly combined.

This will be a very liquid bundt batter, unlike most bundt mixtures.  Because of this, after you pour the batter into the bundt pan, you will need to tap the pan several times on the counter to release any air bubbles.  Bake for 45-50 minutes or until a skewer in the center comes out clean.  Although my oven runs hot, for this cake I actually did have to bake it for the full 50 minutes.

Cool the cake on a rack for 10 minutes before inverting and removing from pan.  Allow the cake to cool for 2 hours (no joke!), before glazing and decorating with the orange zest.

My family loved this!  I served it with whipped cream and they were happy to take leftovers with them after dinner.  It's another keeper that I'll make again next  year.

Sunday, December 29, 2013

Chocolate Toffee Shortbread Cups

Well, this Christmas week turned out to be one for the record books!  On December 21st at 9:45 pm EST, due to a very heavy freezing rain storm, our power went out.  This created a problem for this procastinator, because I had planned to bake on the 22nd!  The storm turned out to be the worst in Ontario's history and in my area of the city some residents are still waiting for electricity.  In addition to the ice, the thousands of damaged trees took out hydro lines and it's a long, slow process to repair them safely.

On to my dilemna...baking!  I thought that since I had "so much" time before Christmas, I wouldn't have to rush - ha!  I should have kept to my usual paranoid ways and started two weeks before, but not this year.  That's a mistake I won't make again, reinforced power grid or not!

Every year I like buying the December issue of Canadian Living, especially for the cookie and treat recipes.  Their recipes are tried and true and most that I've made have become family favourites.  This year I planned to make Lemon Curd Sandwich Cookies - which didn't happen - and Chocolate Toffee Shortbread Cups, which I made this morning.  They are a teenie treat and more like a candy than a cookie.


Ingredients for Shortbread Cups:
1 cup (2 sticks) unsalted, room temp butter
3/4 cup icing sugar
1/2 tsp vanilla
2 cups all-purpose flour

Toffee Chocolate Filling:
3/4 cup mini semi-sweet chocolate chips
3/4 cup toffee bits

In a stand mixer, blend all shortbread ingredients until fully incorporated.  Do not refrigerate.  Roll by 2 tsp increments, to make 48 balls of dough.  Because I love using my graduated baking scoops, I made sure I had the right amount and then scooped them all out very quickly.  This is enough for two mini muffin pans.  Press gently into the bottoms and up sides of mini muffin pans.  Refrigerate until firm, about 30 minutes.

Preheat oven to 325 degrees.  Once the cups are chilled, spoon rounded tsp into each cup.  Bake until edges are light golden, 20-25 minutes.  Because my oven gets quite hot, they were done in 20 minutes, so you should watch to make sure they don't over brown.  Allow to cool and then remove from pan gently, using the tip of a sharp knife to lift out the cups.

They're sweet, buttery and flaky.  I'll definitely make them again next year!  Now I just have to pick a weekend to use up a jar of Yorkshire Lemon Curd for those other cookies...

Friday, October 18, 2013

Apple Frangipane Galette and Lemon Curd Tartlettes

Well, I finally did it - I've conquered home made pastry dough!  With Thanksgiving approaching, I knew I couldn't put it off any longer and it was time to stop buying frozen Pillsbury pie dough.

Since Duncan has been part of the family, an apple dessert is always including in our Thanksgiving celebration.  You'll note I didn't say dinner - that's because we celebrate the European way, by having our coffee and cake (or other yummies) in the afternoon, long before we're too stuffed with dinner.  When my baking buddy Teresa and I were planning what we were making for the holiday, I decided I wanted to make a free form, rustic "pie" or a galette.  I had visions of the pie dough not rolling out properly, or being full of holes and I thought I could hide any issues more easily with a galette.  Teresa did a little Googling and found the filling recipe on Shawna Server's website for Apple Frangipane Galette.  My picture isn't great, but it tasted amazing!


About a month ago, I found a terrific little book at Marshall's in the kitchen section for $5.99 (you can also get it on Amazon for $15ish).  It's called "Cutie Pies" by Dani Cone and features nothing but mini pie recipes.  She also included recipes for butter, graham and savoury doughs and it looked pretty foolproof, or so I hoped.  As it turned out, the butter dough recipe worked flawlessly and I'll be using it from now on.  I made enough for 2 crusts because I was going to be using real lemon curd that Sarah and Jeff had brought me from England and wanted to make tartlettes.


Frangipane Base for Galette
4 ounces almond paste, crumbled (I bought mine at Bulk Barn)
1.5 tsp sugar
1.5 tsp all purpose flour
1/4 tsp almond extract
6 tbsp unsalted butter at room temperature
1 large egg at room temperature
1 tsp rum, Kirsh or Calvados (optional, I didn't use it)

All-Butter Pie Crust - for one double crust pie or 2 single crusts
2.5 cups all purpose flour
1 tsp salt
1 tsp granulated sugar
1 cup (2 sticks) unsalted butter, very cold, cut into 1/2 inch pieces
3/4 cup ice cold water

For filling and to finish Galette
6 medium Granny Smith apples (3 lbs), peeled, cored and sliced
2 tbsp unsalted butter, melted
4 tbsp granulated, Demerara or other coarse style sugar

I combined two methods - the instructions from Shauna Sever's site on assembling the dough along with the recipe from Cutie Pies.

Because my food processor isn't large enough, I used my stand mixer to combine the ingredients.  First measure the water into a measuring cup and leave it in the freezer to chill.  Cube the butter and have it ready to mix, keeping it in the fridge.  Using the paddle mixer, combine the dry ingredients.  Add the butter pieces and mix until the butter is the size of peas.  Add the water all at once and mix just until the dough comes together.  I shaped the dough into two disks, wrapped in plastic wrap and refrigerated them overnight.  You could also use it after 30 minutes, but I wanted to bake the morning of our holiday dinner.

Preheat oven to 375 degrees. When you're ready to bake, take the dough out and allow 15-30 miutes to soften enough to roll out.  While it rests on the counter, mix the frangipane filling.  Again, using the mixer, crumble the almond paste into small pieces.   Mix with the sugar, flour and almond extract in the bowl and mix until very well blended, then add the egg and liqueur, if using.  Mix until smooth, but don't worry if it doesn't look perfect.  It will "melt" as it bakes.

Prep a baking sheet with parchment paper and roll the dough into a 14" circle.  I knew I wasn't making very many tarts, so I'd be using more dough than a regular pie uses.  Roll your dough onto your rolling pin and transfer it to the baking sheet.  Spread the frangipane into a 10-12 inch sized circle and top with the apples.  Since the galette is folded over the apples, I dusted the apples that would be under the crust with a few teaspoons of sugar.  Then fold the pastry dough around the galette.  It's easy to even it out so that the dough is distributed easily.  Take your melted butter and brush the dough *and* the apples, until it's all used.  Sprinkle the dough and uncovered apples with sugar and bake for one hour.  The apples will actually collapse quite a bit, with is why my galette looks like there's a huge gap between the crust the apples.

It was lovely - flaky, buttery and the frangipane is a lovely hint of almond, rather than a strong taste.  The real, British lemon curd was such a treat!  I'm glad I still have half a jar left to enjoy another time soon.

Sunday, September 1, 2013

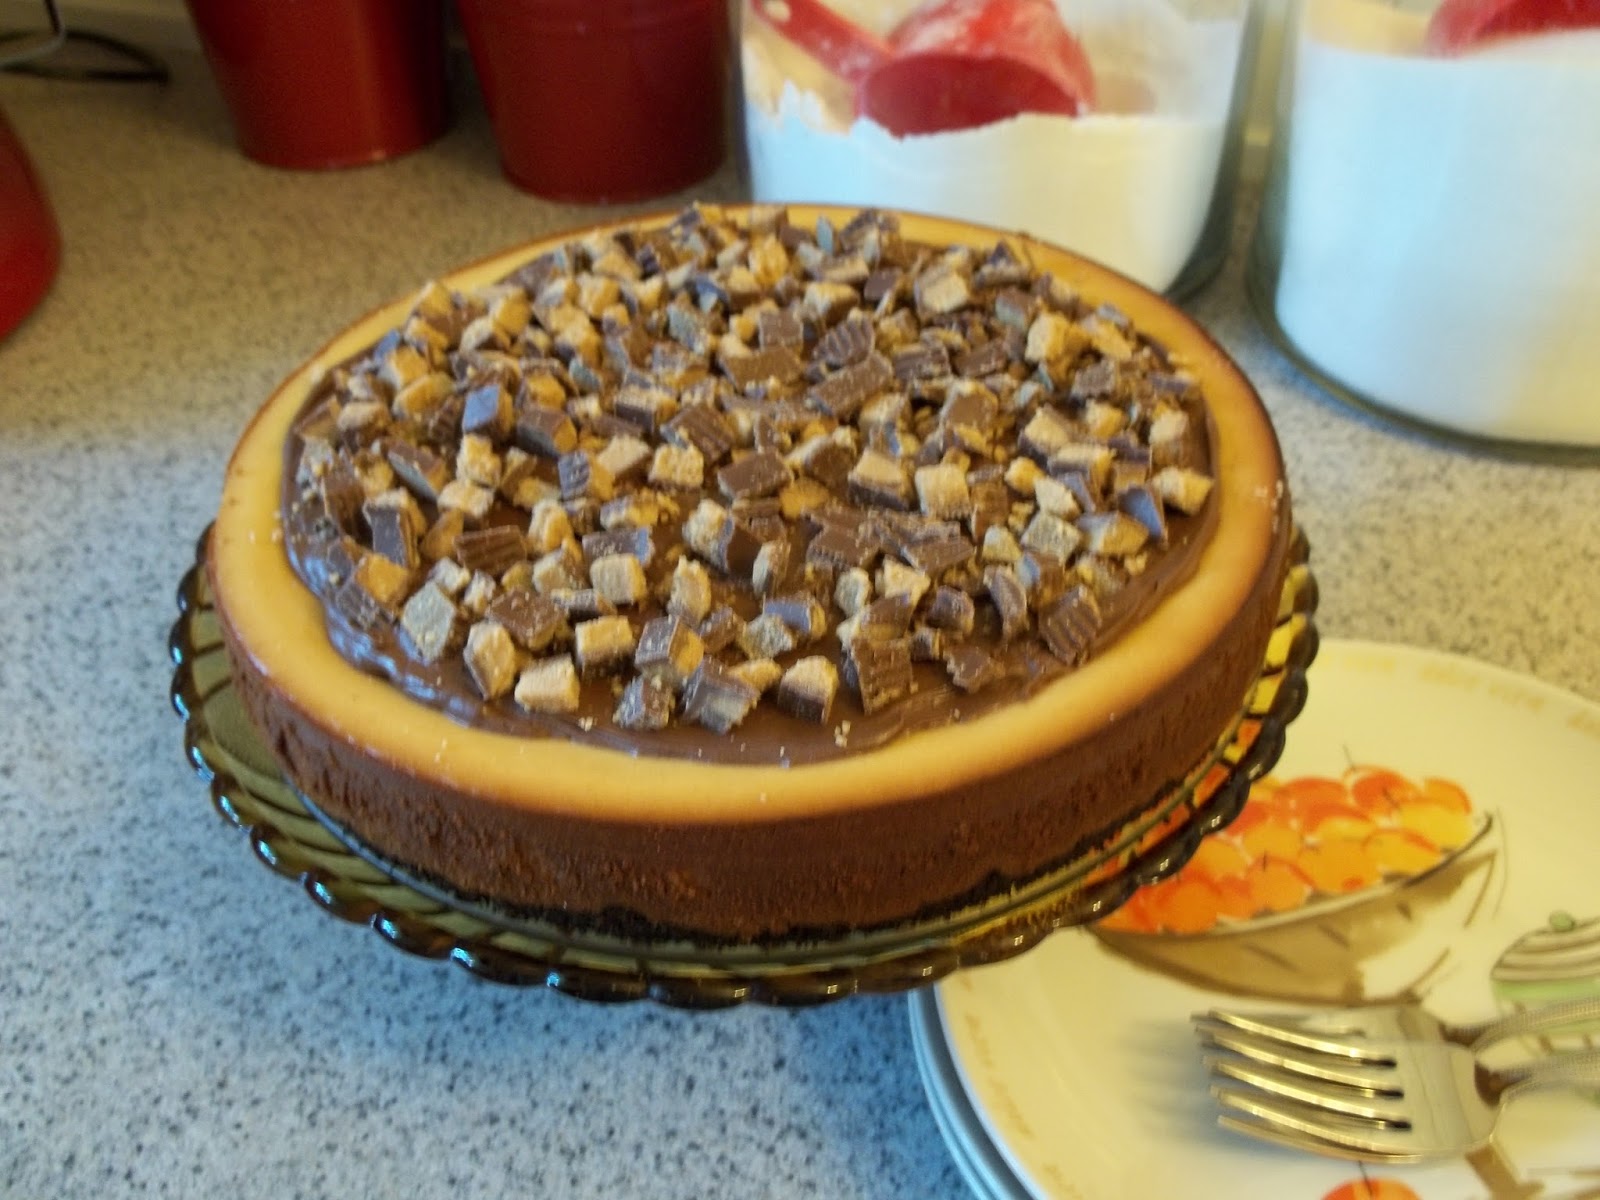
Peanut Butter Chocolate Cheesecake

There are lots of times when we all feel awful, whether it's because of work, family issues or just life in general.  The last two weeks have been very hard - we said goodbye to our sweet little pup almost two weeks ago and I've been having a very hard time without my little shadow to keep me company.

When I was visiting my lovely daughter and son-in-law yesterday, I was raving about a recipe I'd made for my younger daughter and her beau, which got the reaction "That's a keeper!"  I said I hadn't blogged in a long time and Megan encouraged me to start again, with this recipe.  She also doesn't like cheesecake, but after describing this, she now wants to try it!  Wonders will never cease...  After making an apple bundt cake this afternoon for a friend's visit tomorrow, I realized Megan was right and that it was time to blog again, because I really do love to share my recipes and results.

I got the original recipe, Reese's Peanut Butter Chocolate Mini Cheesecakes from 
Gimme Some Oven and a did a test run on my office buddies.  The reaction was great - my baker buddy Teresa's comment was (basically one word) "OmigoodIloveitcanIhavetherecipe?"  I only took 8 to the office and they were a universal hit.  The recipe said it could also be made as an entire cheesecake and I thought I'd try it that way, since it was actually less work to make one cake rather than a tray of minis.

 No surprise here, but of course I amended the recipe by reducing the fat content, increasing the crust base (essential!) and not making ganache as a topper.  Everyone loved it, so I'll keep making it this way!


Ingredients for Crust:
2 cups chocolate cookie crumbs - I got mine at Bulk Barn
4 tbsp melted butter

Cheesecake Ingredients:
2 bricks (16 oz or 500 grams) reduced fat, plain cream cheese
1/2 cup smooth peanut butter
3/4 cup light brown sugar, firmly packed
2 eggs, at room temperature
1/4 cup light cream - I used 5% coffee cream
1/2 tsp vanilla extract

Topping:
Prepared chocolate icing, 1/2 to 3/4 cup worth
Reese's Peanut Butter Cups, diced - I used 7 from a 12 pack

Preheat oven to 350 degrees.  In a medium bowl, whisk together the cookie crumbs and melted butter until thoroughly mixed.  In  8-9" springform pan, spread the crumb mixture evenly and bake for 10 minutes.  Allow to cool thoroughly while the filling is prepared.

In a large mixer bowl combine the cream cheese and peanut butter at medium speed, until smooth.  You will need the scrape the bowl at least once to make sure it's evenly mixed.  Add the brown sugar, followed by the eggs one at a time, then the cream and vanilla.  Scrape the bowl again to make sure everything is incorporated.  Pour over cooled crumb base.

At this point there are two trains of thought about baking cheesecake.  The traditional method is to use a "Bain Marie", or water bath, where the springform pan is wrapped in foil and set into a pan filled 2/3 of the way with heated water.  The cheesecake then bakes in this "bath" and you pray that there isn't even a teenie, tiny hole anywhere in the foil, because if there is it's curtains for your cheesecake.

I used another method and will do it again this way.  Instead of setting the springform into the pan of water, I put the water bath on the rack under the one with the cheesecake on it.  The theory is that the moist air in the oven will prevent the cheesecake from cracking, because it takes so long to bake and set.  Even with the pan in the water, I've had them crack.  With this cheesecake, a small crack formed along the inside of the pan, but I knew it would be covered by icing, so I wasn't worried.

Bake the cheesecake for 45 minutes, then allow to sit in the cooling oven for another hour to fully set.  There is no way to cut back on the time with this step, so don't even consider it.  ;)  At this point, it will need to be chilled at least four hours or overnight for the flavour to fully develop.  This is also the real reason cheesecakes don't get made that often - you need to plan ahead!

The next day, I warmed prepared chocolate icing for 10-15 seconds in the microwave and very gently spread it over the top, completely covering the "fault line". ;)  The diced peanut butter cups were spread out immediately so they'd stick and that was it!  It sliced beautifully, so you could potentially get 12 slices out of one pan, but ours didn't go that far.  I'm pretty sure I'll be making it again on Thanksgiving weekend!

Thursday, July 4, 2013

Time for a change...

... and no, not to the blog, but my kitchen!

For those of you who know me in real life know that I LOVE colour - so much so that when I painted my kitchen 8 years ago I took a bold leap with red.  The bulk of kitchen, i.e. cabinets and walls, were painted ivory but the portion below counter height was red, that is Behr Paint "Daredevil Red" was is an exact match with my mixer Big Red. ;)  The prep and painting took about a week of my time because the red needed one coat of grey primer and three coats of red for full colour saturation.  I separated the two colours with a small cherry border at counter height.  About 5 years ago, I got bored and applied a new, much wider border that looked like a French village street scene.

Now, I do still love red - it's my favourite colour after almost every shade of green, but it was getting a bit worn around the doorways and I was getting bored with it - all of it!  My girls are horrified - they have decreed that almost any other colour will be "boring" because I've been toning down my colour choices in the last few years.  Friends keep saying "but I love that red!"  Sorry gang, but I'm the one living with it, so it's my choice to make the a change.

Where initially it looked French-influenced (border, mugs, bowls, artwork), now it's going to look more rustic.  I have quite a bit of art in the room, including 2 fruit and veg paintings by my daughter, and all my red tools, gadgets and collectibles will remain including this little chicken dish:


When I was in South Carolina, I picked up a really cute repro vanilla extract bottle, that looks like these.  It's an homage to my love of baking:


And so it this, which will get hung on the wall - it's just like my grandmother's egg beater:


I've already displayed vintage cookie cutters in a jar that were my mum's, just like these:


 (All images courtesy Google.com)

I made sure to take before shots, because I really did love how it looked, and I'll take some afters with the new paint colour, new chair covers and accessories from around the house.  After scraping off the border last weekend, this one will be spent washing the walls and priming that red.  Then I'll need another weekend to tape and paint before I can enjoy my handiwork.

Sunday, June 2, 2013

Chocolate Cherry Cupcakes

I'm not going to call myself a bad blogger, just an absent one - life takes over like that sometimes!  Apart from my daughter's upcoming wedding on June 22nd, the other event that took a lot of planning and work was her bridal shower on April 28th.  Baking was only part of all the work, which started with *what* I wanted to bake.

Megan's favourite fruit is the cherry, so I wanted to incorporate it into one of the desserts.  My first thought was a variation of Black Forest Cherry cake.  Most people I know love it - I'm not one of them.  When I was younger my mother made it a LOT.  As I got older, I was surprised with more than one bakery version of this cake, which was too much for my liking!  It's not just the whole combo that I dislike, but I also can't stand whipped cream.  Pretty strange for a baker to admit that, but we all have our preferences and it's never been one of mine.  So I kept Googling for a chocolate cherry combo and I found this recipe at The Cupcake Project blog - the link will take you directly to the recipe.


I made the cupcakes (on the red 2-tiered stand) in a mini size, so that everyone could sample lots of the goodies we made.  They are a very dense, rich chocolate with the flavour of cherry added by using Maraschino cherry liquid.  Boy, were they a hit, especially with our bride-to-be!

The icing was pretty, light pink since cherry preserves are used in the frosting.  I cheated completely with the frosting and didn't make it from scratch.  Betty Crocker came to my rescue with prepared cream cheese frosting and I added only the jelly portion of the preserves (I think some small cherry bits snuck in too) and mixed up a full container of the frosting.  As a combo, there was no cloying sweetness to them, just a nice balance of rich chocolate with cherry.

My lovely daughter Sarah, the Maid of Honour at the upcoming wedding, baked the Martha Stewart gluten free brownies pictured above and I made mini meringues with vanilla chips inside and pink pearl dragees as a decoration.  We had guests with dietary restrictions at the shower, so everything was labelled to avoid any confusion.

The shower was a blast and I sent lots of goodies home with everyone so that I can fit into my Mother of the Bride dress in under three weeks!

Tuesday, March 5, 2013

Gingerbread Cookies

Yes, I know it's over two months since Christmas, but I wanted to share the recipe because it was a bit hit.  The previous Christmas Sarah said she really liked gingerbread, but I ended up baking too much else and ran out of time, so they never got made.  Flash forward a year and this recipe worked out so well that they're now on the official "family favourites" list!   Please note the wobbly letter on each of the big kids' cookies. ;)


I found this recipe in the little added baking cookbook that came with the December 2012 issue of Canadian Living magazine.  I looked at the various gingerbread cookie recipes in my library and this seemed like the most straightforward.  Many of the recipes require 2 kinds of molasses, corn syrup, etc. which I couldn't be bothered with.  I already had a container of "Grandma's Fancy Molasses" at home and it worked just fine.

Ingredients:
  • 3/4 cup (175 mL) unsalted butter, softened
  • 3/4 cup (175 mL) packed brown sugar
  • 1 egg
  • 3/4 cup (175 mL) cooking molasses
  • 4-1/2 cups (1.125 L) all-purpose flour
  • 2 tsp (10 mL) ground ginger
  • 1 tsp (5 mL) cinnamon
  • 3/4 tsp (4 mL) baking soda
  • 1/2 tsp (2 mL) ground cloves
  • 1/4 tsp (1 mL) baking powder
  • 1 pinch salt
Directions:

The original recipe calls for the first steps to be done by hand – seriously?  I used my Kitchenaid mixer bowl for mixing all the dough using the paddle attachment and saved myself a *lot* of grief.  First, I don't have a lot of strength in my hands and second, this ensured that everything blended evenly.  In a large mixer bowl, beat butter with brown sugar until fluffy; beat in egg and molasses. This has been suggested by lots of other bakers before me, but spray your mixing cup with non-stick or lightly wipe with oil before pouring in the molasses.  It will make this step so much easier and the accurate amount ends up in the dough.

In a separate large bowl, whisk together flour, ginger, cinnamon, baking soda, cloves, baking powder and salt; mix slowly into molasses mixture in 3 additions.  Divide the dough into thirds, then shape into flat rectangles. Wrap each and refrigerate until firm, about 2 hours.  I took my dough out of the fridge about 10-15 minutes before I started to roll it out, just to get it to room temp and make it a little more pliable.

Between parchment paper, roll out each rectangle to 1/4-inch (5 mm) thickness. The recipe suggested using large, 5" inch gingerbread boy cookie cutters, which would yield 20 large cookies.  I used my regular Christmas cookie cutters (boy, candycane and mitten) and ended up with around 4 dozen cookies, give or take.  You can also collect the scraps, re-chill and cut them out again.  I was so impressed with how easy this dough was to work with - it didn't break up, it cut cleanly and the recut scrap cookies even baked perfectly.

Arrange the cookies 1 inch (2.5 cm) apart on parchment paper lined baking sheets.  They do not spread while baking, so this is plenty of space.  Bake in 325°F (160°C) oven until firm to the touch and light golden on edges, about 12-15 minutes. Keep a close eye on them so that they don't overbake.  Transfer to racks and let cool completely before storing or icing.

I didn't decorate my cookies until the morning after baking and the "kids" told me they were much more tender after a night's rest in a plastic container.  Rather than make my own royal icing, which is not that hard to do, but since I was running out of time and steam at this point, I copped out and used purchased cookie icing, along with tubes of coloured gel icing.


Images courtesy Google.com


While the icing was wet, I went to town with lots of sprinkles and made boys and girls out of the "boy" shape, along with the initial mittens and trees you can see above.  The big kids loved them and I heard that the cookies that I sent with them to other holiday events where also appreciated by everyone.  I'll make sure next year to leave lots of time to bake these in advance.

Friday, March 1, 2013

Raspberry Crumble Bars

Way back in November, after my last post (what a long time ago!), my lovely best friend Fern came to my place for her belated birthday lunch, which included these treats to go with our coffee.  I warned Fern in advance that she was going to be my first tester for this recipe and I'm happy to say that she loved them.


Image courtesy BarefootContessa.com

When I got Ina's latest cookbook "Foolproof" in October, I knew this was the first recipe I wanted to try.  My first attempt went pretty well and I know that the men in Fern's life enjoyed the extra bars too, so I knew I had a hit on my hands.

Ingredients:
  • 1/2 pound (2 sticks) unsalted butter, at room temperature
  • 3/4 cup sugar
  • 1 teaspoon pure vanilla extract
  • 2-1/3 cups all-purpose flour
  • 1/2 teaspoon salt
  • 10 to 12 ounces good raspberry jam
  • 2/3 cup good granola without dried fruit
  • 1/4 cup sliced almonds
Directions:

Preheat the oven to 350 degrees.  Place the butter and sugar in the bowl of an electric mixer fitted with the paddle attachment and mix on medium speed just until combined. With the mixer on low, add the vanilla.
Sift the flour and salt together and, with the mixer on low, slowly add to the butter mixture, mixing until it almost comes together in a ball.

Prepare a 9" square baking pan by lining with parchment paper - this will make your life so much easier when removing the entire square, before slicing them up.  Ina's instructions call for turning out the dough onto a board before patting 2/3 of the dough evenly on the bottom of a 9-inch square baking pan and about 1/4-inch up the sides. I skipped this step and just eyeballed how much 2/3 of the dough would be and it still worked well.  Spread the dough with the jam, leaving a 1/4-inch border.

If your granola has fairly large chunks (like the Quaker Harvest Crunch I used), pour it into a small plastic bag, zip shut and then crush the granola until the pieces look fairly even.  You can use either a rolling pin or a rounded bottle to do this quickly.  This will ensure that your granola does not brown unevenly while baking.  Mix the granola into the remaining dough with your hands. Break the dough into small bits and distribute it on top of the jam, covering most of the surface. Sprinkle the almonds on top.  As usual, I patted the almonds into the mixture, also to ensure that they didn't overbake.

I baked the bars for 40 minutes until lightly browned, but depending on your oven they may need 5 more minutes.  Cool completely and cut into 9 or 12 bars.  They keep very well in a sealed container, if they last for more than a day at your house - mine didn't!