Wednesday, August 19, 2015

Why I'll always buy printed cookbooks

Despite the fact that I do almost all my fiction reading in ebook format now, I still love my old favourites and new cookbooks.  Specifically, those that focus exclusively on baking.  When I feel I need inspiration, I'll turn to those I already have worked for me many times, but sometimes I'll find a book that is just too tempting not to add to my collection.  I've donated books that didn't have enough photos because what most bakers (like me) want to see is what the finished product should look like.  And, if we're being perfectly honest, beautiful cookbooks are food porn - it's no different than why we watch the Food Network, right? ;)

I recently bought the most beautiful book for my good friend and baking buddy Teresa.  Butter is by Rosie Daykin, a Canadian baker with two shops in Vancouver, BC.  The book is gorgeous - the photography and layout make you (me?) want to bake everything in there!  Apart from the recipes, the look of the book so pretty - nostalgic rose print end papers and a lovely green satin bookmark ribbon.  Teresa was thrilled with her birthday gift and I decided I liked it so much that I had to get one for myself.  It features so many traditional Canadian recipes, like Nanaimo bars and butter tarts and I especially loved the suggestion to add Smarties to cookies - you can't get much more Canadian than that!


All book images courtesy Amazon.ca
 
Earlier this summer I also picked a baking book by a reliable source - Better Homes and Gardens Baking.  While some of the recipes might not be that innovative, they are reliable, which is what I want in baking recipes.  You can't go wrong with this book either and it's a great help having the basics on hand when you need a reference.
 
 
I bought Flour: A Baker's Collection of Spectacular Recipes after reading Bakerella's review a few years ago and being especially intrigued with the homemade Oreo recipe.  The mixed berry scones also looked delish.  I'm hoping to try both recipes this fall.
 
 
One of my most reliable baking guides is the Complete Canadian Living Baking Book: The Essentials of Home Baking.  I went to a demonstration by Elizabeth Baird, the author of this book and learned so much there that I had to get the book.  It's never disappointed me whether it's trying a new recipe or checking in the "essential" section to clarify a technique.
 
 
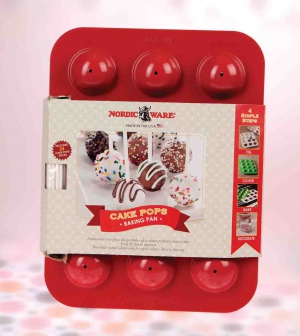
The other little item I find inspiring and have been wanting to try for ages is the Nordic Ware Cake Pops Pan.  I found a great deal at Homesense (Homegoods to my US friends) - how could I pass up this pan for $7, especially when they are my favourite baking pans by far.

Image courtesy Google.com

With an upcoming family birthday and Thanksgiving in October, I'm already planning what I want to make next this fall.


Tuesday, August 18, 2015

Super Moist Chocolate Cake - with a secret ingredient!

My son-in-law Duncan recently celebrated his birthday and I volunteered to make his cake.  My daughter Megan asked me to make it chocolate and I remembered this recipe.  It's an oldie, but a goodie and has an ingredient most people wouldn't associate with cake - mayonnaise!  Because there is no butter or oil used in the cake, the mayonnise is what replaces the fat.

I first made this cake in the 1980's using a version with cake mix as a base.  I've evolved since those days and knew I'd be making this version from scratch.  It's right from the Hellman's website and I didn't change a single thing.  The reason I'm not using a photo of my finished cake is because the icing didn't want to co-operate with the hot weather that day and slid right off the cake!  No-one cared because it still tasted great, even if I did have to scoop up a bit of icing for each slice.

It's a great cake - lovely and moist, with deep dark chocolate flavour.  It sliced beautifully and with an added scoop of vanilla ice cream made everyone very happy.


Image Courtesy Google.com
Here are the details from the Hellman's website.  It's not necessary to use this brand, but it's my favourite.  I used the reduced fat version and it didn't affect the final product at all.
Ingredients
  • 2 cups all-purpose flour                      
  • 2/3 cup unsweetened cocoa powder - make sure to sift it to eliminate lumps 
  • 1 1/4 tsp. baking soda
  • 1/4 tsp. baking powder
  • 3 eggs
  • 1 2/3 cups sugar
  • 1 tsp. vanilla extract
  • 1 cup Hellmann's® Real Mayonnaise
  • 1 1/3 cups water

Directions

  1. 1. Preheat oven to 350°. Grease and lightly flour two 9-inch round cake pans; set aside.
  2. In medium bowl, combine flour, sifted cocoa, baking soda and baking powder; set aside.
  3. In large bowl, with electric mixer at high speed, beat eggs, sugar and vanilla for 3 minutes or until light and fluffy. Beat in mayonnaise at low speed until blended. Alternately beat in flour mixture with water, beginning and ending with flour mixture. Pour into prepared pans.
  4. Bake 30 minutes or until toothpick inserted in centers comes out clean. My oven runs hot, so it only needed 25 miutes, so adjust the time according to your stove.  On wire racks, cool 10 minutes; remove from pans and cool completely. Frost, if desired, or sprinkle with confectioners sugar.

Hope you enjoy it as much we all did!

Friday, August 14, 2015

To tweak or not to tweak, that is the question...

When I first started baking from scratch 8 years ago, I was too afraid to ever deviate from the way a recipe was written.  The more I baked, the more comfortable I got and that's when my tweaking of recipes started.

What I love about baking, for the most part, is how precise it is if you don't mess with the active ingredients, the only things you *can't* tweak!


Image Courtesy Google.com

Once I learned this, it got easier to adjust recipes to suit my and my family's tastes.  My first major success was with Ina Garten's Carrot Cake recipe.  I loved the ingredients, but didn't agree with the quantity of some of the ingredients.  If you're adding pineapple, why does it have to be in such big chunks?  Why is there so much vegetable oil and sugar in the recipe?  After about four tries, it became my Carrot Cake recipe, as inspired by the lovely Ina.  Just as yummy, but with much more crushed pineapple, and drastically less oil and sugar so it was as tasty and moist as the original.

Now when I bake, I have no hesitation in changing the type and quantity of spices listed or swapping out ingredients like fruits and nuts.

Saturday, August 1, 2015

Carrot Zucchini Bars

I found this recipe at Better Homes and Gardens online and thought it might appeal to my co-workers, which it did!  They were so easy to make - I didn't even need to use Big Red.  Here's the original recipe, but of course I couldn't resist tweaking it.


Image Courtesy BHG.com

Mine didn't look as pretty as these.  I used a pan that was a little too large, so they needed more height, but they still tasted great.  I didn't add the raisins, since most of my buddies don't like them, so I increased the walnuts to 3/4 cup.   Instead of a half tsp of ground ginger, I used 1/4 tsp each of ginger and cinnamon.  It's a less intense flavour, but when I asked all my taste testers if if needed more ginger, they thought it was perfect.  I also copped out and used container cream cheese frosting with pure orange extract.  Everyone loved the frosting!  I'll be making these again for sure.

Ingredients 

1-1/2 cups flour
1 tsp baking powder
1/4 tsp baking soda
1/4 tsp each ground ginger and cinnamon
2 eggs, slightly beaten
1 small zucchini, shredded, approx. 1 cup.  I found a medium was too much.
1-1/2 cups shredded carrot
3/4 cup chopped walnuts
3/4 cup packed brown sugar
1/4 cup liquid honey
1/2 cup cooking oil
1 tsp vanilla
3/4 container cream cheese frosting
1 tsp finely grated orange or lemon peel OR pure lemon or orange extract

Preheat oven to 350 degrees.  Prepare a 13 x 9 inch baking pan by either lining with parchment paper (my preferred method), or using a baking spray.

In a large bowl, combine flour, baking powder, baking soda, ginger and cinnamon.  Whisk to combine.  In another large bowl, combine beaten eggs, brown sugar, oil, honey, vanilla, carrots and zucchini until thoroughly mixed.  Add wet to dry ingredients until just combined.  You don't want to overmix or the squares will be tough.

Spread evenly in baking pan and bake for 25 minutes, or until a toothpick in the centre comes out clean.  Cool completely on a wire rack before removing.  Using the parchment paper allows you to lift the entire thing out before slicing, which is why I prefer it over just spraying the pan.

I like to warm the prepared frosting in the microwave for 30 seconds then add the extract or zest, which allows it to incorporate evenly.  Once it's completely cooled, frost the entire pan worth before cutting into squares.  I cut it into 24 generous sized pieces and boy, were they gone fast.

Finding Inspiration

My poor, neglected little blog!  I thought for sure  I'd be writing long before these last 13 months, but I haven't felt inspired at all.  It's not that I haven't been baking or trying out new recipes, but I nothing felt interesting or tasty enough to share.  Sometimes you need to discover a new source to give you a kick start and I found a British competition on PBS that I just love.

The Great British Baking Show is wonderful!  It's a competition, but the hosts are charming, not mean and the bakers treat each other with respect, not undermining each other.  It's aired in the UK already, but we're down to the last five bakers in the show as of this week.


Another unexpected source of inspiration came from a dear friend, who found a single calendar page and sent it to me.  It's designed by Caitlin McClain of Little Low - I love her designs so much I think I need to buy something!  It's a simple phrase, but something I'll be framing for my kitchen:

"Good things come to those who bake."

Just perfect and it summarizes WHY I bake.  Now, off to find some new recipes!


Monday, July 7, 2014

Chunky Monkeys

Sometimes when you don't spend a lot of a money on a cookbook, you luck out.  I picked up "The Cookie Bible" a while ago for only $6 when one of my favourite bookstores was closing for, based on how cute the cookies looked.  As it turned out, this recipe was delish too!

In addition to blueberries and lemon, the other flavour combo that's always a hit in my family is bananas with chocolate chips.  Add some walnuts and you can't go wrong in a cookie!  After making over 3 dozen, by late afternoon and family visiting during the day and send some home with my daughter and son-in-law, there were only TEN cookies left!  So much for my plan to share them with my co-workers. ;)


As usual, since it was the first time baking these, I followed the instructions exactly, even though I found the 300 degree setting for the oven very low.  The cookies took longer to bake than instructed, but they did turn out perfectly - soft and tender!

Ingredients:
2-2/3 cups flour
1/2 tsp baking soda
1/4 tsp salt
1 cup (2 sticks) softened butter
1 cup packed light brown sugar
1/2 cup granulated sugar
1 cup mashed bananas - use ripe, but *not* brown bananas for better cookie structure
1 egg
1/2 tsp banana extract, if you have it.  I don't so I used pure vanilla extract instead.
1-1/2 cups dark chocolate chips
1 cup chopped walnuts

Preheat oven to 300 degrees.  Whisk flour, baking soda and salt in bowl and set aside.  In a stand mixer, combine butter and both sugars until light and fluffy.  Add banana, egg and vanilla extract (or banana) and beat until just blended.  As usual, take time to scrape the bowl completely to ensure all ingredients are incorporated.

Add flour mixture until just blended.  Slowly mix in chocolate chips and walnut pieces.  This will be a rather wet dough, so I used my tablespoon scoop with a glass of hot water to dip the scoop into between measures.  Space evenly on parchment lined baking sheets.  I was worried that the cookies would run together while baking, but they held their shapes nicely.

The recipe called for baking them for 20 minutes or until the edges were lightly browned.  At 20 minutes, I tapped a cookie from the first batch lightly and could tell it wasn't baked yet.  I gave them another 4 minutes and they were perfect.  My second batch was perfect at 12 minutes per rotation (i.e., switch the pans for even baking through the process).

For once, I didn't count exactly how many this cookie dough yielded.  I'm going to guess at least 4 dozen, but boy did they go fast!  My daughter commented that "these are dangerous because they're not that sweet, so you could eat 20 of them before you realized how many you had."  I'll take that as an endorsement to make them again.

Sunday, June 29, 2014

My Very Own Bag End

There are times in your life when you don't want to bake, no matter how much you enjoy it.  Deciding to throw your own fundraising milestone birthday party is one of them.

This year I reached the age 60 milestone along with a number of my good friends.  Originally I wasn't happy about it at all, so I wanted to turn a negative feeling into something positive.  I've been a supporter of Habitat for Humanity for a long time (and yes, I've worked on a build) so I decided to tie it into one of my other loves, that is anything Tolkien-related.  This gave me the theme for the party - Hobbits for Habitat!  When you reach this age in your life, you really don't need a lot of "stuff", so I asked my family and friends to donate to Habitat in lieu of gifts.  I have to say that everyone was very generous with their donations and I truly did appreciate the flowers I received on the day of the party.

My gift to myself was a custom Bag End cake.  If you know Tolkien, you'll know that Bag End is the home of both Bilbo and Frodo Baggins, the two most famous Hobbits in Tolkiens books.  My girls have jokingly called me a Hobbit for years, given that I'm height challenged and if I could, I'd move right into Bag End if it existed in Toronto. ;)  This cake was my closest facsimile, created by Sam Anderson of Cakes Cove:

(Photo courtesy George Winter - thanks!)

You can see mini Bilbo and mini Bella Gamgee (me!) having tea and cake on their picnic blanket.  Those decorations are made of gum paste and will keep forever - I just have to find a little clear box to put them in, to keep in my kitchen.

Everyone was just blown away by the detail of the cake and the fact that the entire thing was edible.  The tree was solid chocolate, as was the rail fence, the benches in front of the door and the stonework around the door and window.  Everything was absolutely delicious - the combo of chocolate cake with mocha truffle filling was a real hit!  Deciding not to bake my own cake was probably the best party idea I had and I know that everyone appreciated it almost as much as I did.